


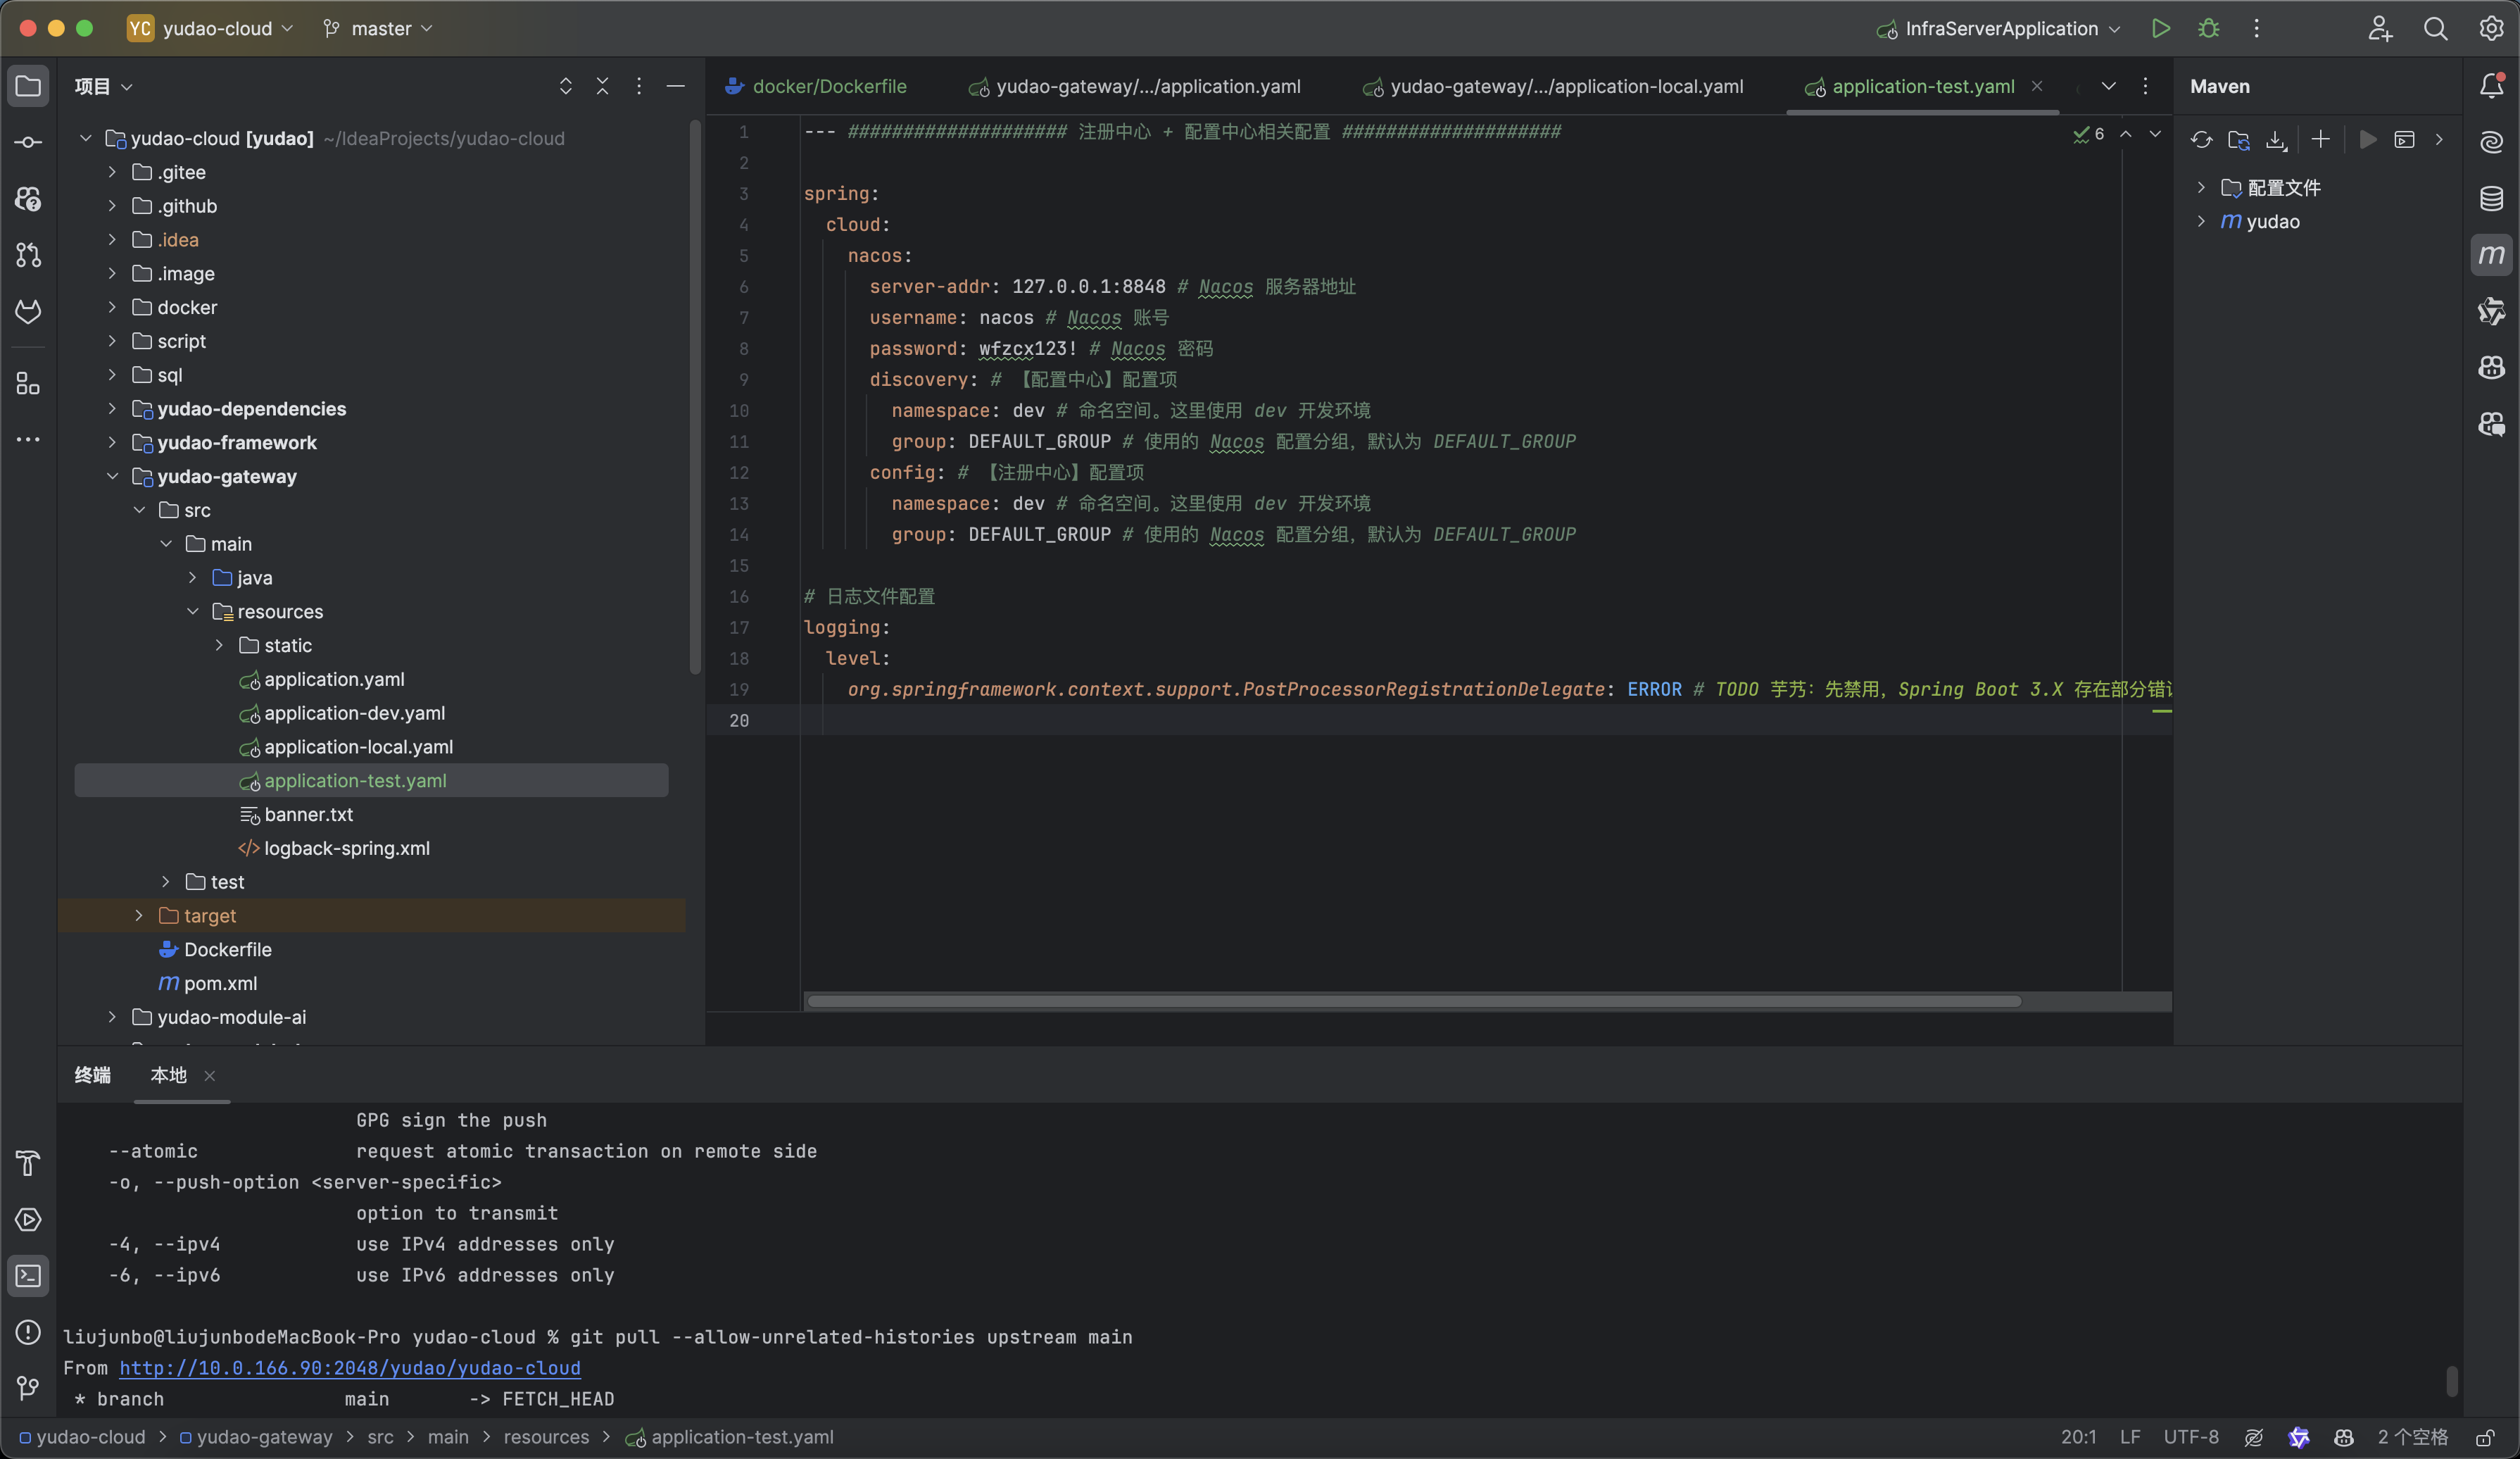
一、创建test配置文件
在每个微服务的模块中创建application-test.yaml文件。
分别修改三个微服务gateway、system、infra三个配置文件,主要修改nacos的配置。数据库的配置也可以到nacos中配置,其中的nacos地址为k8s中负载的暴漏地址,nacos搭建,参考:k8s部署nacos服务
gateway的配置
--- #################### 注册中心 + 配置中心相关配置 ####################

spring:
  cloud:
    nacos:
      server-addr: nacos.k8stest:8848 # Nacos 服务器地址
      username: nacos # Nacos 账号
      password: wfzcx123! # Nacos 密码
      discovery: # 【配置中心】配置项
        namespace: test # 命名空间。这里使用 dev 开发环境
        group: DEFAULT_GROUP # 使用的 Nacos 配置分组,默认为 DEFAULT_GROUP
      config: # 【注册中心】配置项
        namespace: test # 命名空间。这里使用 dev 开发环境
        group: DEFAULT_GROUP # 使用的 Nacos 配置分组,默认为 DEFAULT_GROUP

# 日志文件配置
logging:
  level:
    org.springframework.context.support.PostProcessorRegistrationDelegate: ERROR # TODO 芋艿:先禁用,Spring Boot 3.X 存在部分错误的 WARN 提示
system配置
--- #################### 注册中心 + 配置中心相关配置 ####################

spring:
  cloud:
    nacos:
      server-addr: nacos.k8stest:8848 # Nacos 服务器地址
      username: nacos # Nacos 账号
      password: wfzcx123! # Nacos 密码
      discovery: # 【配置中心】配置项
        namespace: test # 命名空间。这里使用 dev 开发环境
        group: DEFAULT_GROUP # 使用的 Nacos 配置分组,默认为 DEFAULT_GROUP
        metadata:
          version: 1.0.0 # 服务实例的版本号,可用于灰度发布
      config: # 【注册中心】配置项
        namespace: test # 命名空间。这里使用 dev 开发环境
        group: DEFAULT_GROUP # 使用的 Nacos 配置分组,默认为 DEFAULT_GROUP

--- #################### 数据库相关配置 ####################
spring:
  # 数据源配置项
  autoconfigure:
    exclude:
      - com.alibaba.druid.spring.boot.autoconfigure.DruidDataSourceAutoConfigure # 排除 Druid 的自动配置,使用 dynamic-datasource-spring-boot-starter 配置多数据源
      - de.codecentric.boot.admin.client.config.SpringBootAdminClientAutoConfiguration # 禁用 Spring Boot Admin 的 Client 的自动配置
  datasource:
    druid: # Druid 【监控】相关的全局配置
      web-stat-filter:
        enabled: true
      stat-view-servlet:
        enabled: true
        allow: # 设置白名单,不填则允许所有访问
        url-pattern: /druid/*
        login-username: # 控制台管理用户名和密码
        login-password:
      filter:
        stat:
          enabled: true
          log-slow-sql: true # 慢 SQL 记录
          slow-sql-millis: 100
          merge-sql: true
        wall:
          config:
            multi-statement-allow: true
    dynamic: # 多数据源配置
      druid: # Druid 【连接池】相关的全局配置
        initial-size: 1 # 初始连接数
        min-idle: 1 # 最小连接池数量
        max-active: 20 # 最大连接池数量
        max-wait: 600000 # 配置获取连接等待超时的时间,单位:毫秒
        time-between-eviction-runs-millis: 60000 # 配置间隔多久才进行一次检测,检测需要关闭的空闲连接,单位:毫秒
        min-evictable-idle-time-millis: 300000 # 配置一个连接在池中最小生存的时间,单位:毫秒
        max-evictable-idle-time-millis: 900000 # 配置一个连接在池中最大生存的时间,单位:毫秒
        validation-query: SELECT 1 FROM DUAL # 配置检测连接是否有效
        test-while-idle: true
        test-on-borrow: false
        test-on-return: false
      primary: master
      datasource:
        master:
          url: jdbc:mysql://127.0.0.1:3306/ruoyi-vue-pro?useSSL=false&serverTimezone=Asia/Shanghai&allowPublicKeyRetrieval=true&nullCatalogMeansCurrent=true&rewriteBatchedStatements=true # MySQL Connector/J 8.X 连接的示例
          #          url: jdbc:mysql://127.0.0.1:3306/ruoyi-vue-pro?useSSL=true&allowPublicKeyRetrieval=true&useUnicode=true&characterEncoding=UTF-8&serverTimezone=Asia/Shanghai&rewriteBatchedStatements=true # MySQL Connector/J 5.X 连接的示例
          #          url: jdbc:postgresql://127.0.0.1:5432/ruoyi-vue-pro # PostgreSQL 连接的示例
          #          url: jdbc:oracle:thin:@127.0.0.1:1521:xe # Oracle 连接的示例
          #          url: jdbc:sqlserver://127.0.0.1:1433;DatabaseName=ruoyi-vue-pro # SQLServer 连接的示例
          #          url: jdbc:dm://10.211.55.4:5236?schema=RUOYI_VUE_PRO # DM 连接的示例
          username: root
          password: 123456
        #          username: sa # SQL Server 连接的示例
        #          password: JSm:g(*%lU4ZAkz06cd52KqT3)i1?H7W # SQL Server 连接的示例
        #          username: SYSDBA # DM 连接的示例
        #          password: SYSDBA # DM 连接的示例
        slave: # 模拟从库,可根据自己需要修改
          lazy: true # 开启懒加载,保证启动速度
          url: jdbc:mysql://127.0.0.1:3306/ruoyi-vue-pro?useSSL=false&serverTimezone=Asia/Shanghai&allowPublicKeyRetrieval=true&nullCatalogMeansCurrent=true&rewriteBatchedStatements=true
          username: root
          password: 123456

  # Redis 配置。Redisson 默认的配置足够使用,一般不需要进行调优
  redis:
    host: 127.0.0.1 # 地址
    port: 6379 # 端口
    database: 0 # 数据库索引
#    password: 123456 # 密码,建议生产环境开启

--- #################### MQ 消息队列相关配置 ####################

# rocketmq 配置项,对应 RocketMQProperties 配置类
rocketmq:
  name-server: 127.0.0.1:9876 # RocketMQ Namesrv

spring:
  # RabbitMQ 配置项,对应 RabbitProperties 配置类
  rabbitmq:
    host: 127.0.0.1 # RabbitMQ 服务的地址
    port: 5672 # RabbitMQ 服务的端口
    username: guest # RabbitMQ 服务的账号
    password: guest # RabbitMQ 服务的密码
  # Kafka 配置项,对应 KafkaProperties 配置类
  kafka:
    bootstrap-servers: 127.0.0.1:9092 # 指定 Kafka Broker 地址,可以设置多个,以逗号分隔

--- #################### 定时任务相关配置 ####################

xxl:
  job:
    enabled: false # 是否开启调度中心,默认为 true 开启
    admin:
      addresses: http://127.0.0.1:9090/xxl-job-admin # 调度中心部署跟地址

--- #################### 服务保障相关配置 ####################

# Lock4j 配置项
lock4j:
  acquire-timeout: 3000 # 获取分布式锁超时时间,默认为 3000 毫秒
  expire: 30000 # 分布式锁的超时时间,默认为 30 毫秒

--- #################### 监控相关配置 ####################

# Actuator 监控端点的配置项
management:
  endpoints:
    web:
      base-path: /actuator # Actuator 提供的 API 接口的根目录。默认为 /actuator
      exposure:
        include: '*' # 需要开放的端点。默认值只打开 health 和 info 两个端点。通过设置 * ,可以开放所有端点。

# Spring Boot Admin 配置项
spring:
  boot:
    admin:
      # Spring Boot Admin Client 客户端的相关配置
      client:
        instance:
          service-host-type: IP # 注册实例时,优先使用 IP [IP, HOST_NAME, CANONICAL_HOST_NAME]

# 日志文件配置
logging:
  level:
    # 配置自己写的 MyBatis Mapper 打印日志
    cn.iocoder.yudao.module.system.dal.mysql: debug
    cn.iocoder.yudao.module.system.dal.mysql.sms.SmsChannelMapper: INFO # 配置 SmsChannelMapper 的日志级别为 info
    org.springframework.context.support.PostProcessorRegistrationDelegate: ERROR # TODO 芋艿:先禁用,Spring Boot 3.X 存在部分错误的 WARN 提示

--- #################### 微信公众号、小程序相关配置 ####################
wx:
  mp: # 公众号配置(必填),参见 https://github.com/Wechat-Group/WxJava/blob/develop/spring-boot-starters/wx-java-mp-spring-boot-starter/README.md 文档
    #    app-id: wx041349c6f39b268b # 测试号(牛希尧提供的)
    #    secret: 5abee519483bc9f8cb37ce280e814bd0
    app-id: wx5b23ba7a5589ecbb # 测试号(自己的)
    secret: 2a7b3b20c537e52e74afd395eb85f61f
    #    app-id: wxa69ab825b163be19 # 测试号(Kongdy 提供的)
    #    secret: bd4f9fab889591b62aeac0d7b8d8b4a0
    # 存储配置,解决 AccessToken 的跨节点的共享
    config-storage:
      type: RedisTemplate # 采用 RedisTemplate 操作 Redis,会自动从 Spring 中获取
      key-prefix: wx # Redis Key 的前缀
      http-client-type: HttpClient # 采用 HttpClient 请求微信公众号平台
  miniapp: # 小程序配置(必填),参见 https://github.com/Wechat-Group/WxJava/blob/develop/spring-boot-starters/wx-java-miniapp-spring-boot-starter/README.md 文档
    #    appid: wx62056c0d5e8db250 # 测试号(牛希尧提供的)
    #    secret: 333ae72f41552af1e998fe1f54e1584a
    #    appid: wx63c280fe3248a3e7 # wenhualian的接口测试号
    #    secret: 6f270509224a7ae1296bbf1c8cb97aed
    #    appid: wxc4598c446f8a9cb3 # 测试号(Kongdy 提供的)
    #    secret: 4a1a04e07f6a4a0751b39c3064a92c8b
    appid: wx66186af0759f47c9 # 测试号(puhui 提供的)
    secret: 3218bcbd112cbc614c7264ceb20144ac
    config-storage:
      type: RedisTemplate # 采用 RedisTemplate 操作 Redis,会自动从 Spring 中获取
      key-prefix: wa # Redis Key 的前缀
      http-client-type: HttpClient # 采用 HttpClient 请求微信公众号平台

--- #################### 芋道相关配置 ####################

# 芋道配置项,设置当前项目所有自定义的配置
yudao:
  env: # 多环境的配置项
    tag: ${HOSTNAME}
  captcha:
    enable: false # 本地环境,暂时关闭图片验证码,方便登录等接口的测试
  security:
    mock-enable: true
  access-log: # 访问日志的配置项
    enable: false
  wxa-code:
    env-version: develop # 小程序版本: 正式版为 "release";体验版为 "trial";开发版为 "develop"
  wxa-subscribe-message:
    miniprogram-state: developer # 跳转小程序类型:开发版为 “developer”;体验版为 “trial”为;正式版为 “formal”

justauth:
  enabled: true
  type:
    DINGTALK: # 钉钉
      client-id: dingvrnreaje3yqvzhxg
      client-secret: i8E6iZyDvZj51JIb0tYsYfVQYOks9Cq1lgryEjFRqC79P3iJcrxEwT6Qk2QvLrLI
      ignore-check-redirect-uri: true
    WECHAT_ENTERPRISE: # 企业微信
      client-id: wwd411c69a39ad2e54
      client-secret: 1wTb7hYxnpT2TUbIeHGXGo7T0odav1ic10mLdyyATOw
      agent-id: 1000004
      ignore-check-redirect-uri: true
    # noinspection SpringBootApplicationYaml
    WECHAT_MINI_APP: # 微信小程序
      client-id: ${wx.miniapp.appid}
      client-secret: ${wx.miniapp.secret}
      ignore-check-redirect-uri: true
      ignore-check-state: true # 微信小程序,不会使用到 state,所以不进行校验
    WECHAT_MP: # 微信公众号
      client-id: ${wx.mp.app-id}
      client-secret: ${wx.mp.secret}
      ignore-check-redirect-uri: true
  cache:
    type: REDIS
    prefix: 'social_auth_state:' # 缓存前缀,目前只对 Redis 缓存生效,默认 JUSTAUTH::STATE::
    timeout: 24h # 超时时长,目前只对 Redis 缓存生效,默认 3 分钟
infra配置
--- #################### 注册中心 + 配置中心相关配置 ####################

spring:
  cloud:
    nacos:
      server-addr: nacos.k8stest:8848 # Nacos 服务器地址
      username: nacos # Nacos 账号
      password: wfzcx123! # Nacos 密码
      discovery: # 【配置中心】配置项
        namespace: test # 命名空间。这里使用 dev 开发环境
        group: DEFAULT_GROUP # 使用的 Nacos 配置分组,默认为 DEFAULT_GROUP
        metadata:
          version: 1.0.0 # 服务实例的版本号,可用于灰度发布
      config: # 【注册中心】配置项
        namespace: test # 命名空间。这里使用 dev 开发环境
        group: DEFAULT_GROUP # 使用的 Nacos 配置分组,默认为 DEFAULT_GROUP

--- #################### 数据库相关配置 ####################
spring:

  # 数据源配置项
  autoconfigure:
    exclude:
      - com.alibaba.druid.spring.boot.autoconfigure.DruidDataSourceAutoConfigure # 排除 Druid 的自动配置,使用 dynamic-datasource-spring-boot-starter 配置多数据源
      - de.codecentric.boot.admin.server.config.AdminServerAutoConfiguration # 禁用 Spring Boot Admin 的 Server 的自动配置
      - de.codecentric.boot.admin.server.cloud.config.AdminServerDiscoveryAutoConfiguration # 禁用 Spring Boot Admin 的 Server 的自动配置
      - de.codecentric.boot.admin.server.ui.config.AdminServerUiAutoConfiguration # 禁用 Spring Boot Admin 的 Server UI 的自动配置
      - de.codecentric.boot.admin.client.config.SpringBootAdminClientAutoConfiguration # 禁用 Spring Boot Admin 的 Client 的自动配置
  datasource:
    druid: # Druid 【监控】相关的全局配置
      web-stat-filter:
        enabled: true
      stat-view-servlet:
        enabled: true
        allow: # 设置白名单,不填则允许所有访问
        url-pattern: /druid/*
        login-username: # 控制台管理用户名和密码
        login-password:
      filter:
        stat:
          enabled: true
          log-slow-sql: true # 慢 SQL 记录
          slow-sql-millis: 100
          merge-sql: true
        wall:
          config:
            multi-statement-allow: true
    dynamic: # 多数据源配置
      druid: # Druid 【连接池】相关的全局配置
        initial-size: 1 # 初始连接数
        min-idle: 1 # 最小连接池数量
        max-active: 20 # 最大连接池数量
        max-wait: 600000 # 配置获取连接等待超时的时间,单位:毫秒
        time-between-eviction-runs-millis: 60000 # 配置间隔多久才进行一次检测,检测需要关闭的空闲连接,单位:毫秒
        min-evictable-idle-time-millis: 300000 # 配置一个连接在池中最小生存的时间,单位:毫秒
        max-evictable-idle-time-millis: 900000 # 配置一个连接在池中最大生存的时间,单位:毫秒
        validation-query: SELECT 1 FROM DUAL # 配置检测连接是否有效
        test-while-idle: true
        test-on-borrow: false
        test-on-return: false
      primary: master
      datasource:
        master:
          url: jdbc:mysql://127.0.0.1:3306/ruoyi-vue-pro?useSSL=false&serverTimezone=Asia/Shanghai&allowPublicKeyRetrieval=true&nullCatalogMeansCurrent=true&rewriteBatchedStatements=true # MySQL Connector/J 8.X 连接的示例
          #          url: jdbc:mysql://127.0.0.1:3306/ruoyi-vue-pro?useSSL=true&allowPublicKeyRetrieval=true&useUnicode=true&characterEncoding=UTF-8&serverTimezone=Asia/Shanghai&rewriteBatchedStatements=true # MySQL Connector/J 5.X 连接的示例
          #          url: jdbc:postgresql://127.0.0.1:5432/ruoyi-vue-pro # PostgreSQL 连接的示例
          #          url: jdbc:oracle:thin:@127.0.0.1:1521:xe # Oracle 连接的示例
          #          url: jdbc:sqlserver://127.0.0.1:1433;DatabaseName=ruoyi-vue-pro # SQLServer 连接的示例
          #          url: jdbc:dm://10.211.55.4:5236?schema=RUOYI_VUE_PRO # DM 连接的示例
          username: root
          password: 123456
        #          username: sa # SQL Server 连接的示例
        #          password: JSm:g(*%lU4ZAkz06cd52KqT3)i1?H7W # SQL Server 连接的示例
        #          username: SYSDBA # DM 连接的示例
        #          password: SYSDBA # DM 连接的示例
        slave: # 模拟从库,可根据自己需要修改
          lazy: true # 开启懒加载,保证启动速度
          url: jdbc:mysql://127.0.0.1:3306/ruoyi-vue-pro?useSSL=false&serverTimezone=Asia/Shanghai&allowPublicKeyRetrieval=true&nullCatalogMeansCurrent=true&rewriteBatchedStatements=true
          username: root
          password: 123456

  # Redis 配置。Redisson 默认的配置足够使用,一般不需要进行调优
  redis:
    host: 127.0.0.1 # 地址
    port: 6379 # 端口
    database: 0 # 数据库索引
#    password: 123456 # 密码,建议生产环境开启

--- #################### MQ 消息队列相关配置 ####################

# rocketmq 配置项,对应 RocketMQProperties 配置类
rocketmq:
  name-server: 127.0.0.1:9876 # RocketMQ Namesrv

spring:
  # RabbitMQ 配置项,对应 RabbitProperties 配置类
  rabbitmq:
    host: 127.0.0.1 # RabbitMQ 服务的地址
    port: 5672 # RabbitMQ 服务的端口
    username: guest # RabbitMQ 服务的账号
    password: guest # RabbitMQ 服务的密码
  # Kafka 配置项,对应 KafkaProperties 配置类
  kafka:
    bootstrap-servers: 127.0.0.1:9092 # 指定 Kafka Broker 地址,可以设置多个,以逗号分隔

--- #################### 定时任务相关配置 ####################
xxl:
  job:
    enabled: false # 是否开启调度中心,默认为 true 开启
    admin:
      addresses: http://127.0.0.1:9090/xxl-job-admin # 调度中心部署跟地址

--- #################### 服务保障相关配置 ####################

# Lock4j 配置项
lock4j:
  acquire-timeout: 3000 # 获取分布式锁超时时间,默认为 3000 毫秒
  expire: 30000 # 分布式锁的超时时间,默认为 30 毫秒

--- #################### 监控相关配置 ####################

# Actuator 监控端点的配置项
management:
  endpoints:
    web:
      base-path: /actuator # Actuator 提供的 API 接口的根目录。默认为 /actuator
      exposure:
        include: '*' # 需要开放的端点。默认值只打开 health 和 info 两个端点。通过设置 * ,可以开放所有端点。

# Spring Boot Admin 配置项
spring:
  boot:
    admin:
      # Spring Boot Admin Client 客户端的相关配置
      client:
        instance:
          service-host-type: IP # 注册实例时,优先使用 IP [IP, HOST_NAME, CANONICAL_HOST_NAME]
      # Spring Boot Admin Server 服务端的相关配置
      context-path: /admin # 配置 Spring

# 日志文件配置
logging:
  level:
    # 配置自己写的 MyBatis Mapper 打印日志
    cn.iocoder.yudao.module.infra.dal.mysql: debug
    cn.iocoder.yudao.module.infra.dal.mysql.logger.ApiErrorLogMapper: INFO # 配置 ApiErrorLogMapper 的日志级别为 info,避免和 GlobalExceptionHandler 重复打印
    cn.iocoder.yudao.module.infra.dal.mysql.file.FileConfigMapper: INFO # 配置 FileConfigMapper 的日志级别为 info
    org.springframework.context.support.PostProcessorRegistrationDelegate: ERROR # TODO 芋艿:先禁用,Spring Boot 3.X 存在部分错误的 WARN 提示

--- #################### 芋道相关配置 ####################

# 芋道配置项,设置当前项目所有自定义的配置
yudao:
  env: # 多环境的配置项
    tag: ${HOSTNAME}
  security:
    mock-enable: true
  access-log: # 访问日志的配置项
    enable: false
二、编写dockerfile文件
在每个服务模块下创建Dockerfile文件,各个微服务模块下的dockerfile大同小异,直接在建一个统一的dcokerfile文件,然后cicd配置的时,进行copy即可内容如下:
FROM openjdk:8
LABEL maintainer=ljb

ENV PARAMS="--server.port=8080 --spring.profiles.active=test"
ENV TIME_ZONE=Asia/Shanghai
RUN /bin/cp /usr/share/zoneinfo/$TIME_ZONE /etc/localtime && echo $TIME_ZONE > /etc/timezone

COPY target/*.jar /app.jar
EXPOSE 8080

ENTRYPOINT ["/bin/sh","-c","java -Dfile.encoding=utf8 -Djava.security.egd=file:/prod/./urandom -jar app.jar ${PARAMS}"]
三、编写流水线
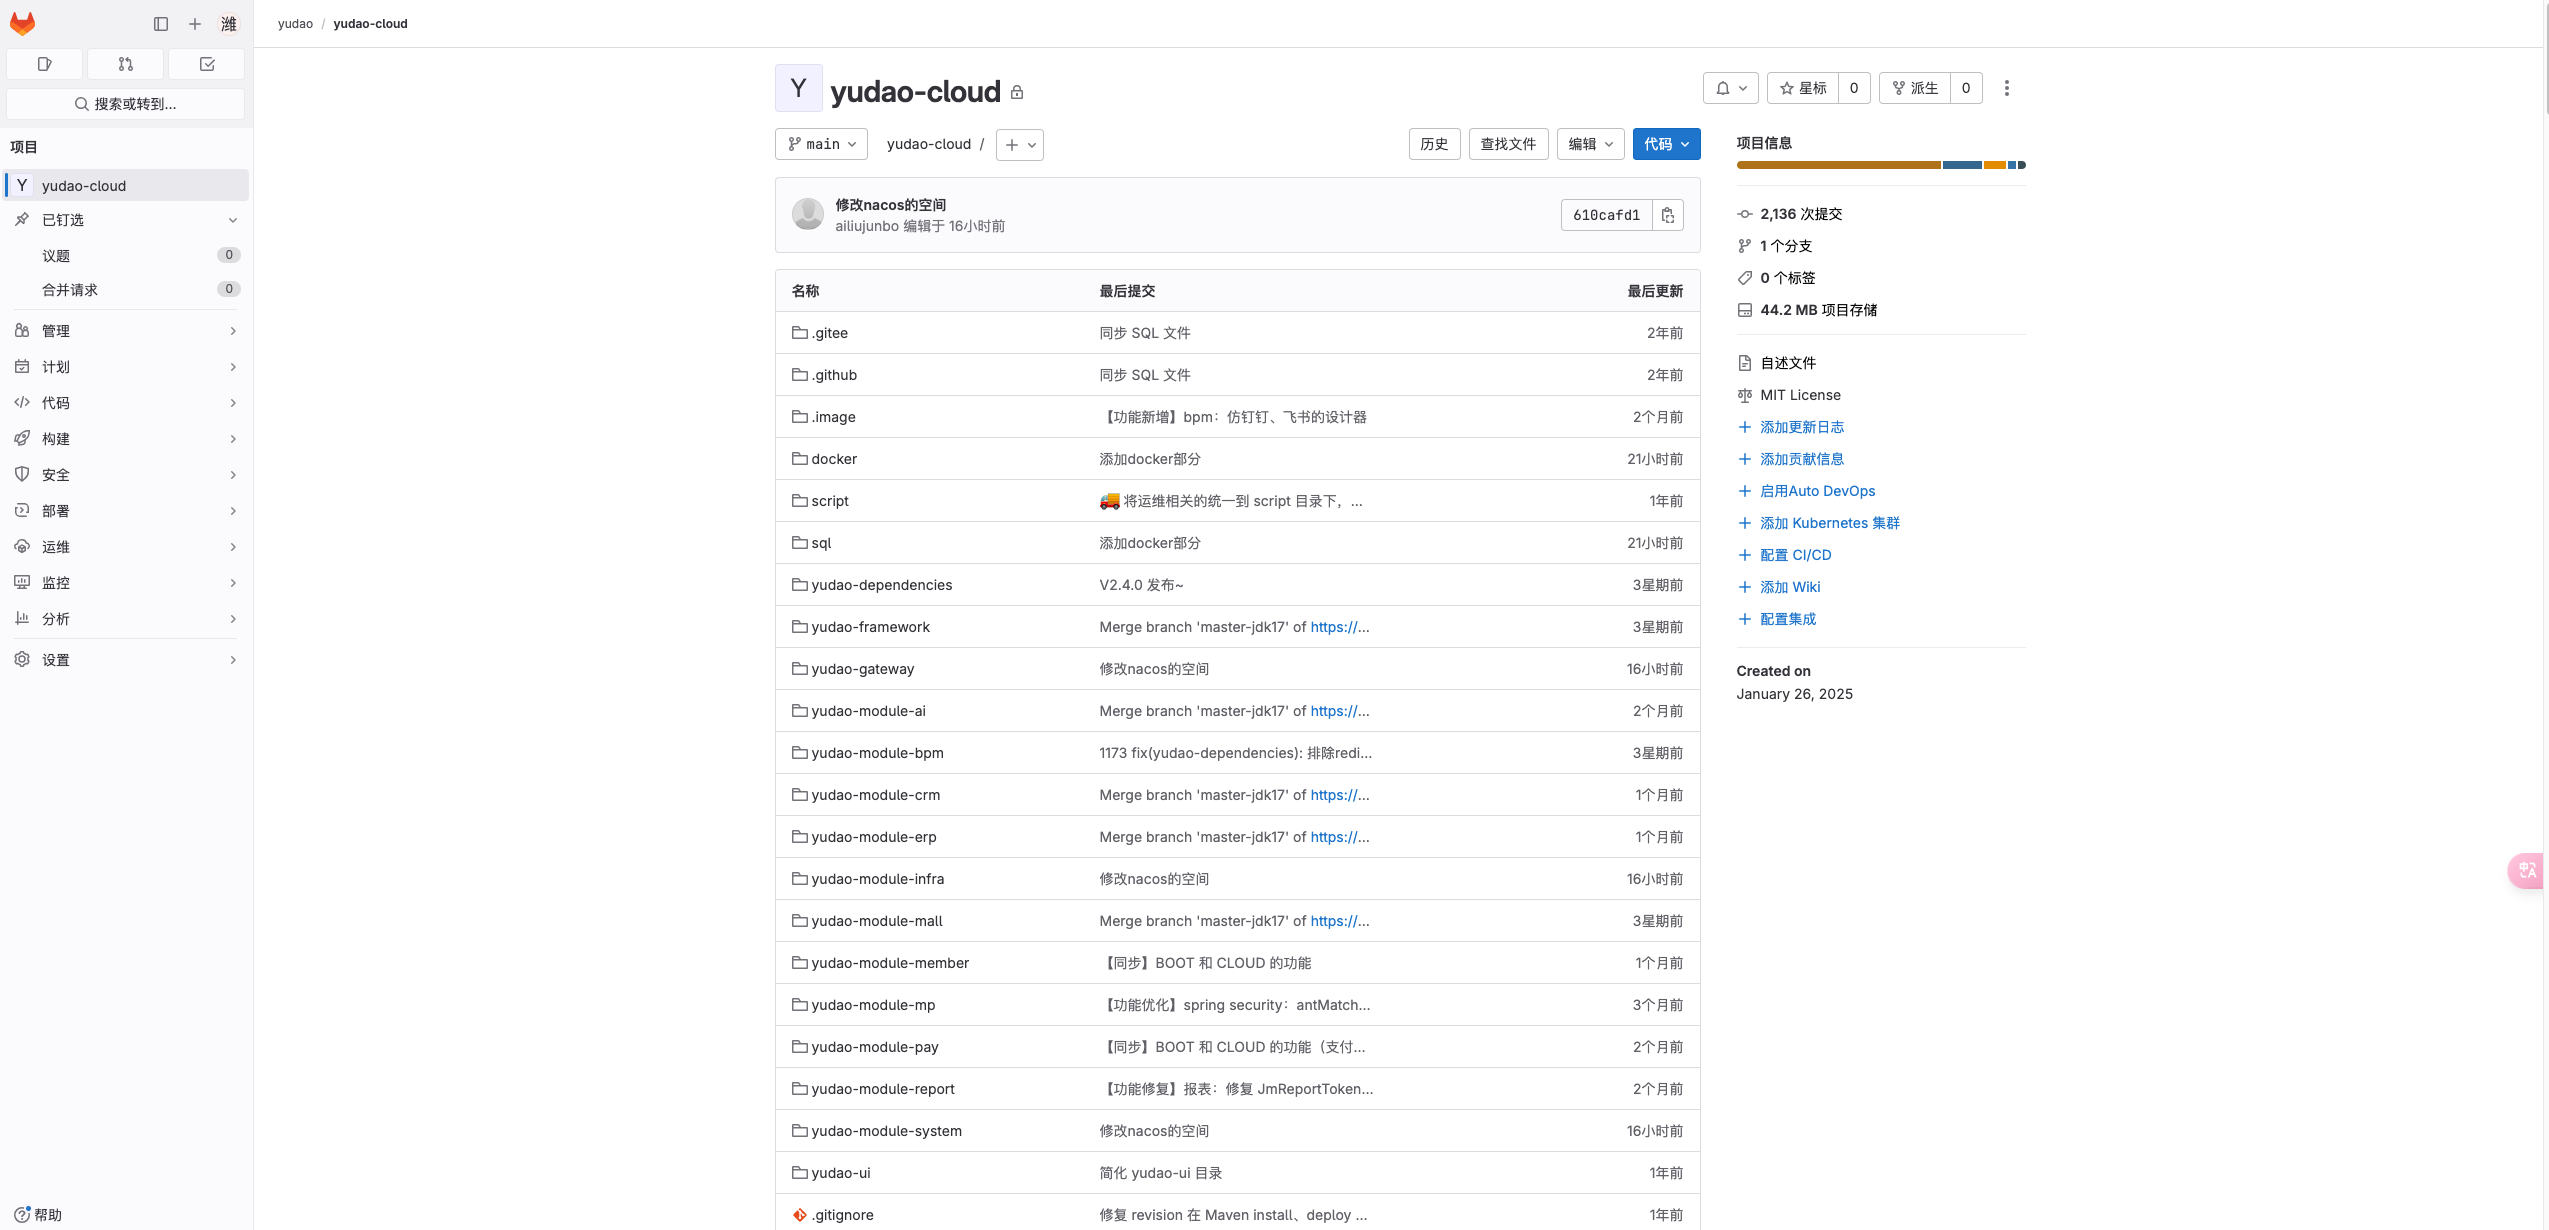
3.1、代码上传gitlab
测试例子为yudao的cloud版本,从github仓库下载,本地上传到私有gitlab需要在本地设置两个远程仓库
3.1.1、在gitlab中创建仓库
创建yudao-cloud仓库
3.1.2、idea配置远程仓库
使用命令添加,用idea自带的配置界面会提示认证失败
git remote add upstream http://10.0.166.90:2048/yudao/yudao-cloud.git
# 从远程仓库拉取代码,并且将历史记录合并
git pull --allow-unrelated-histories upstream main
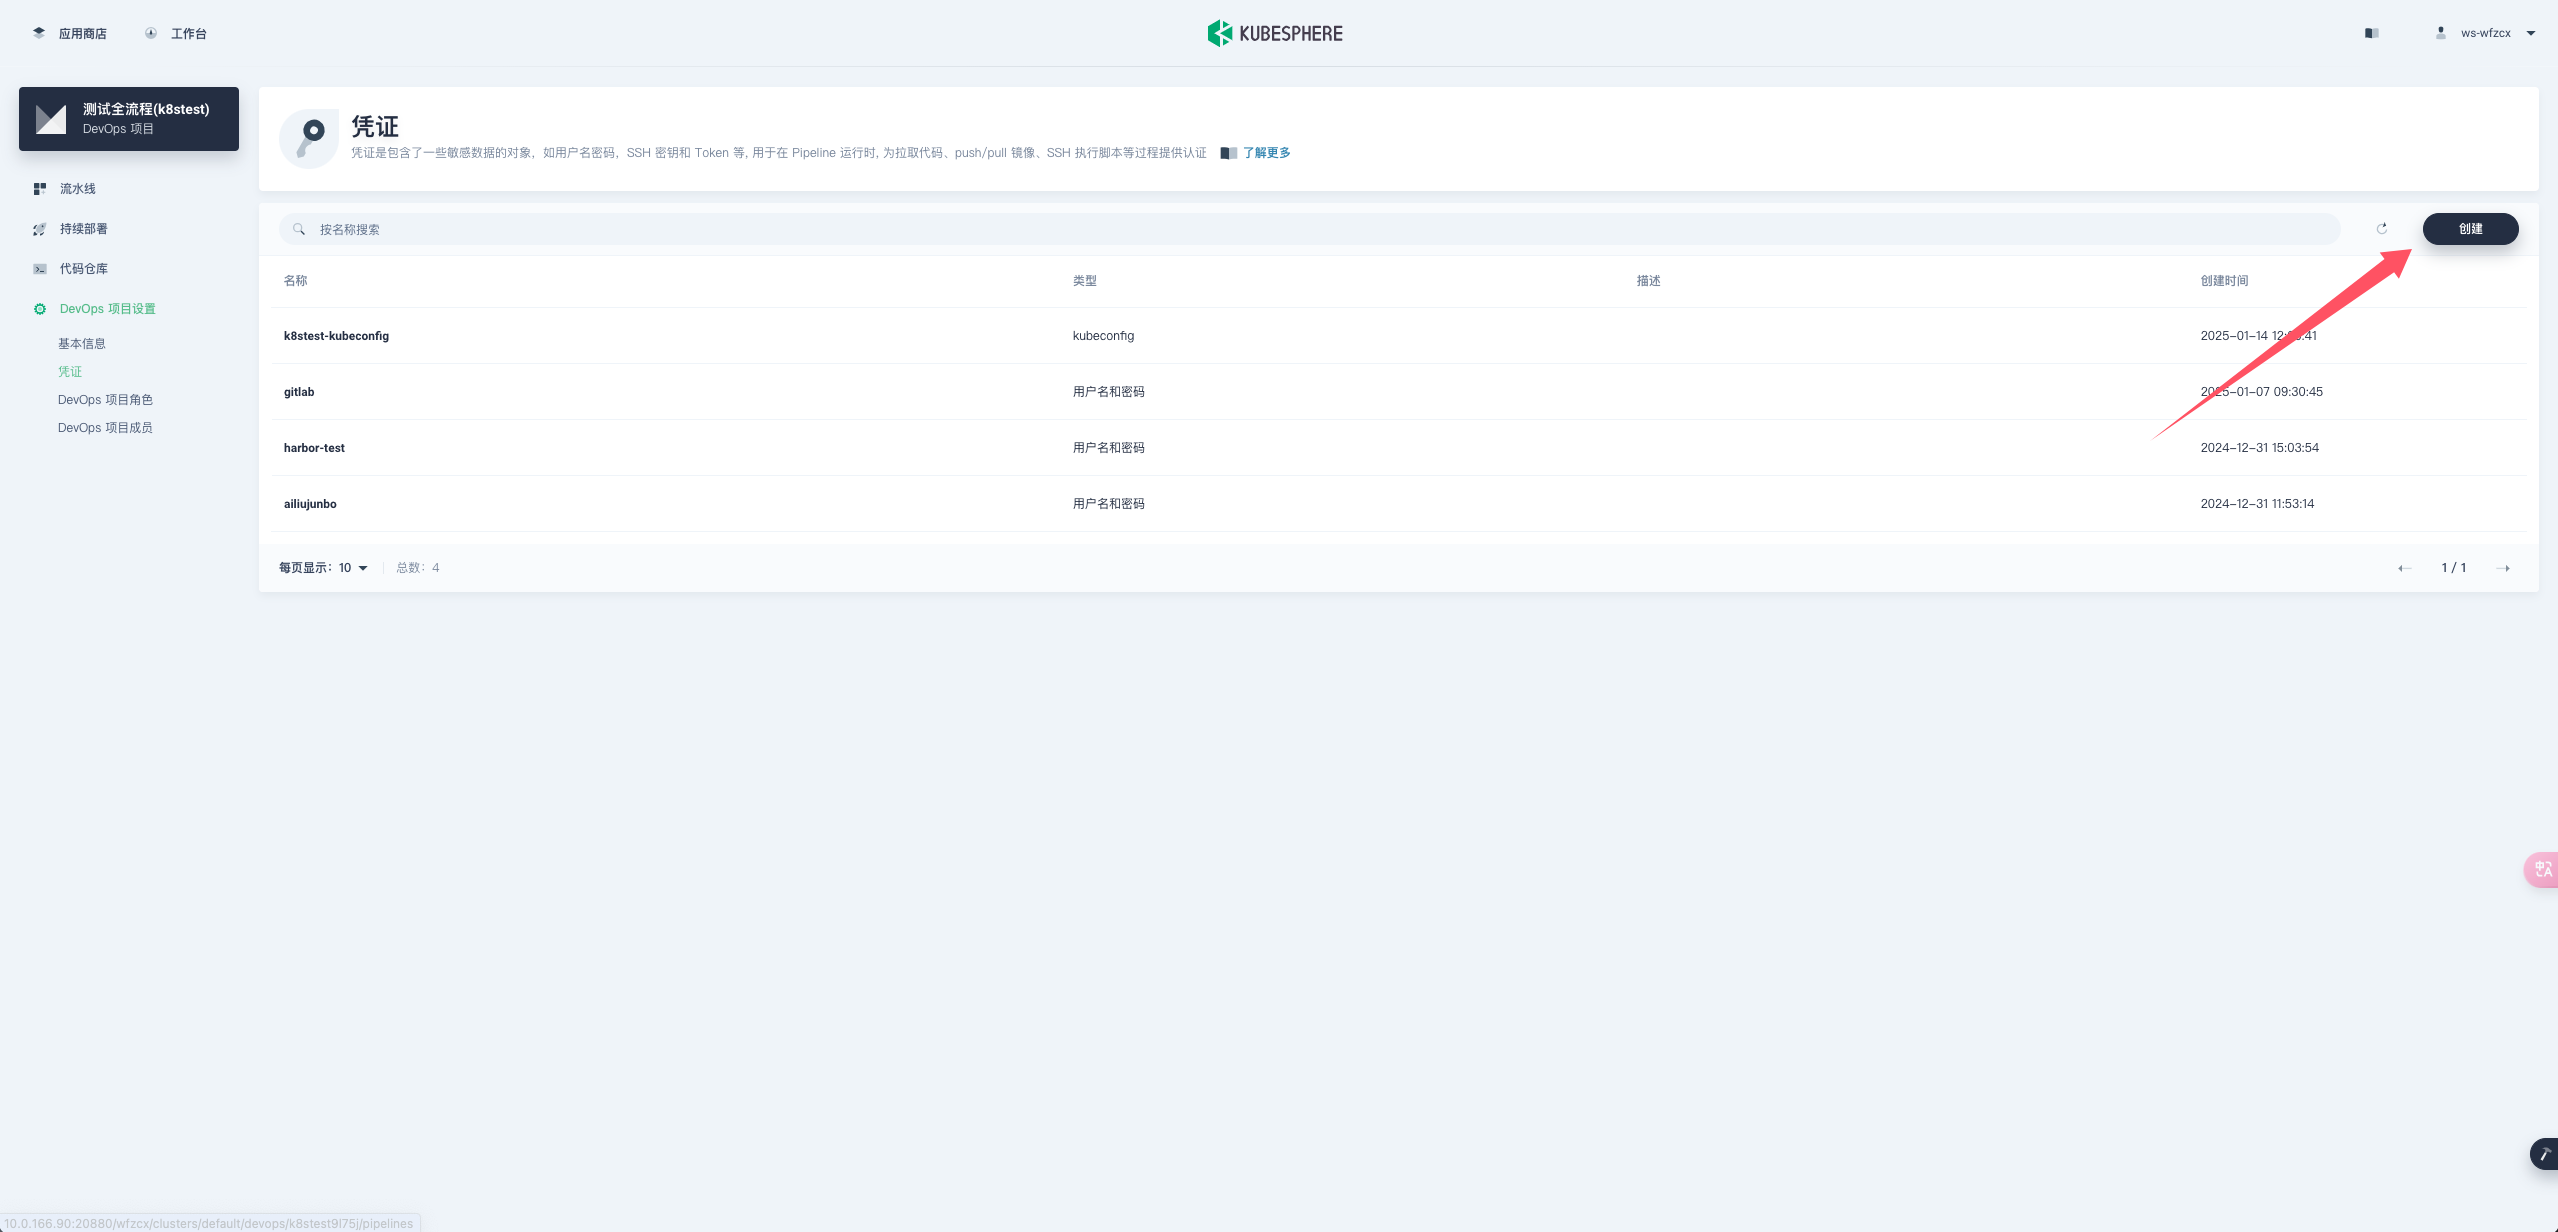
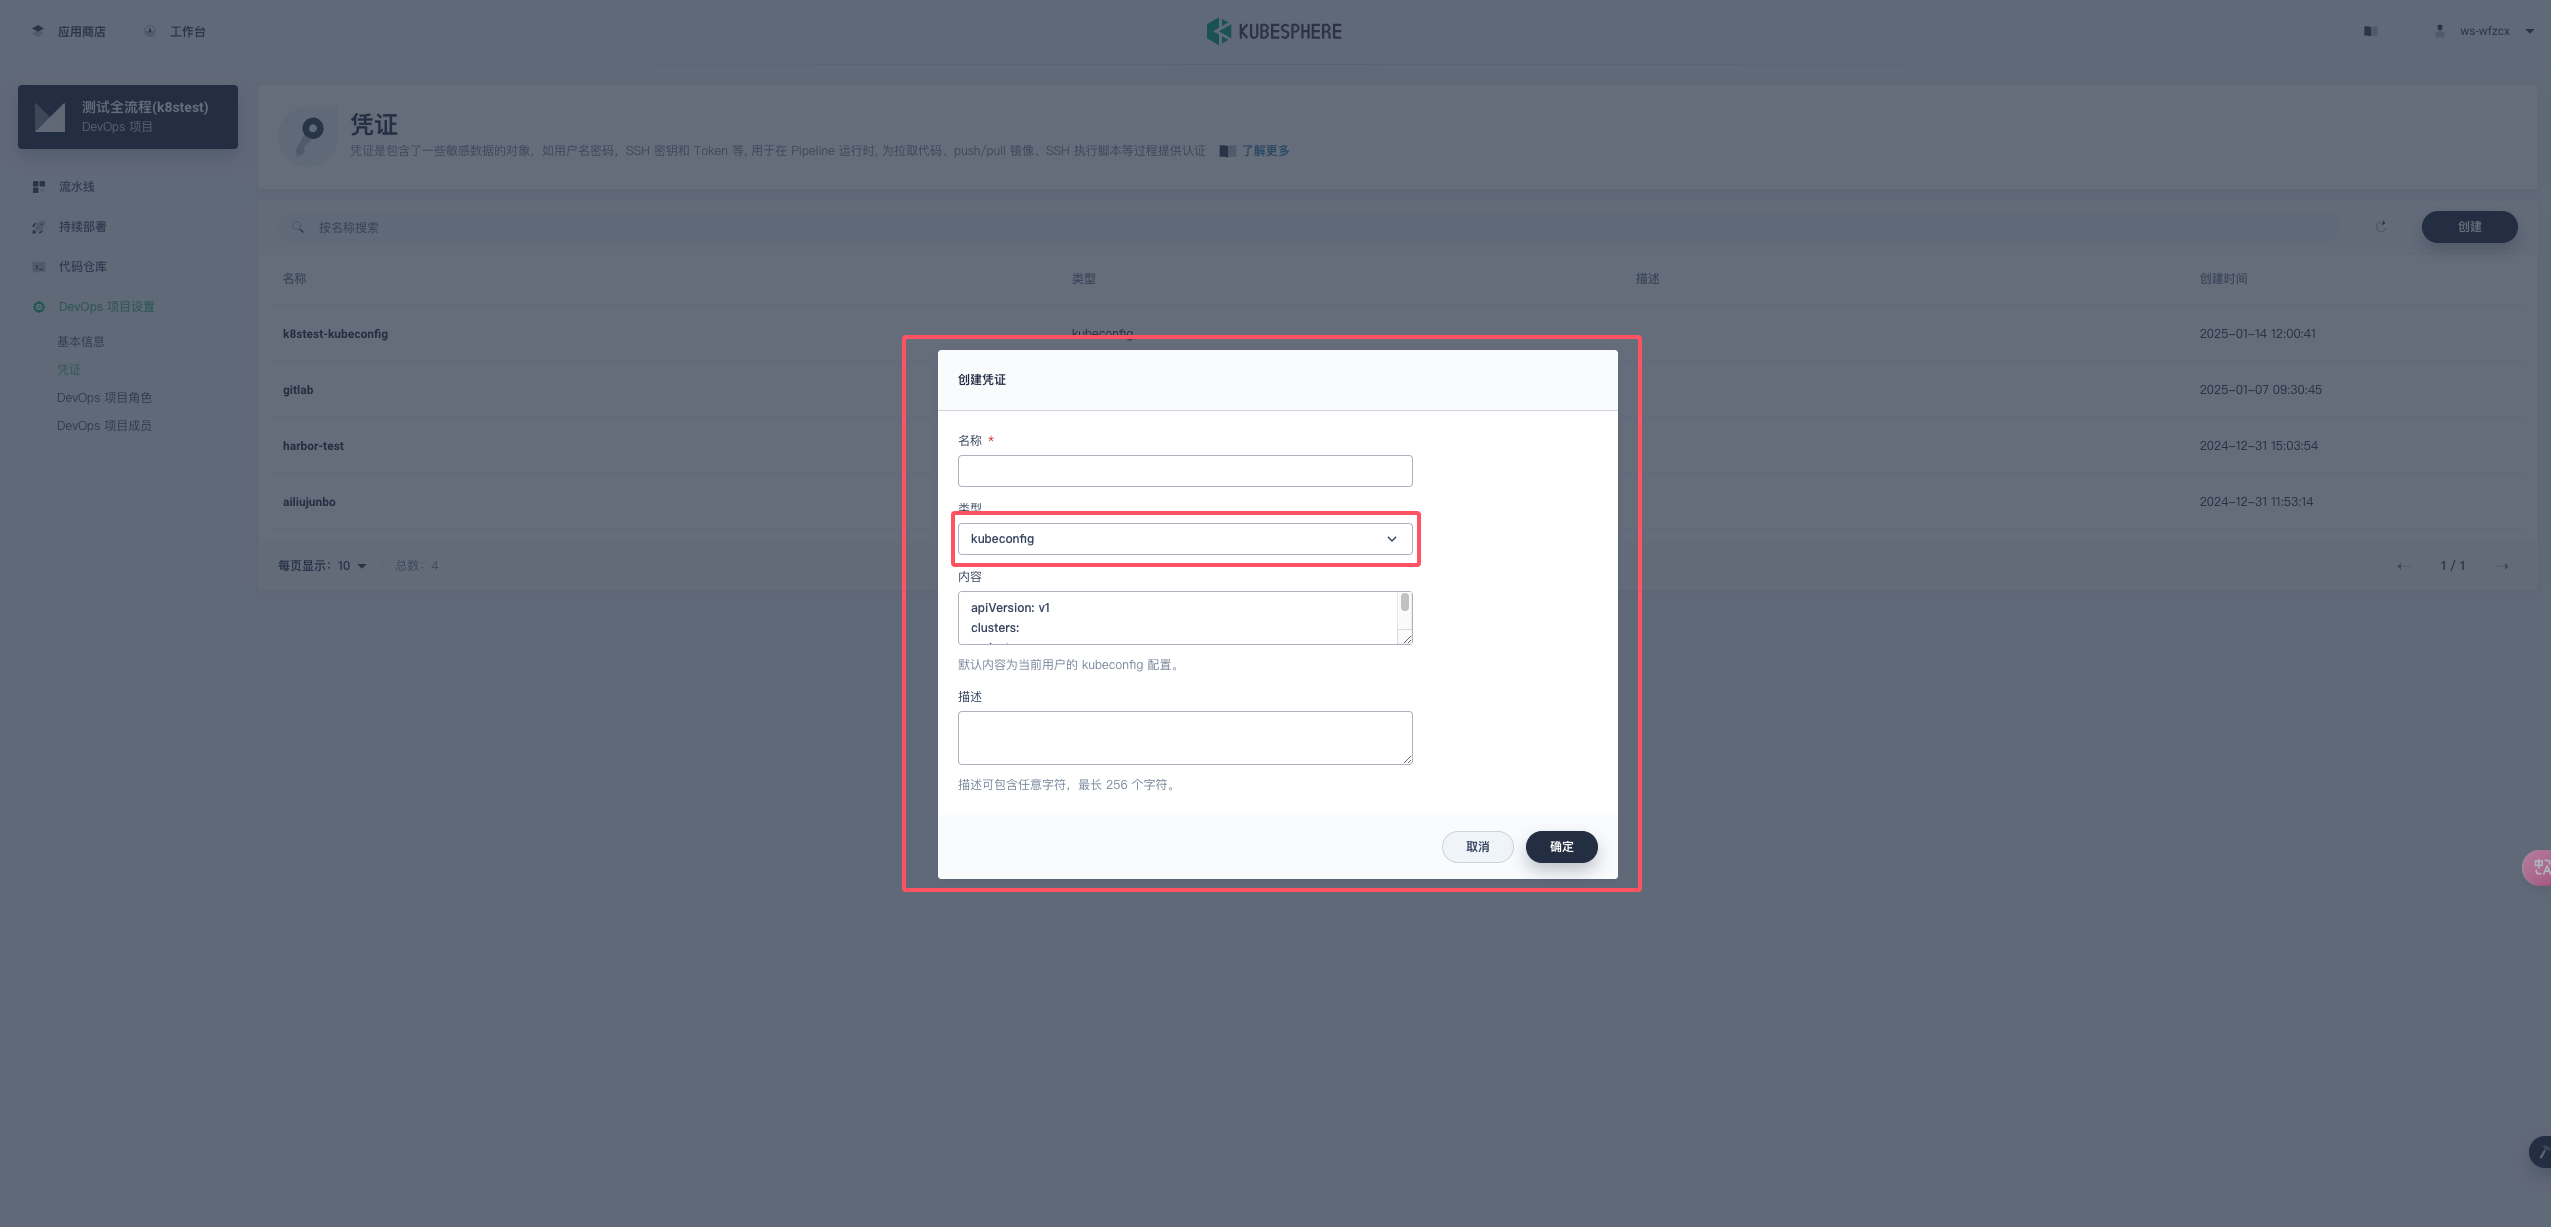
3.2、devops配置凭证
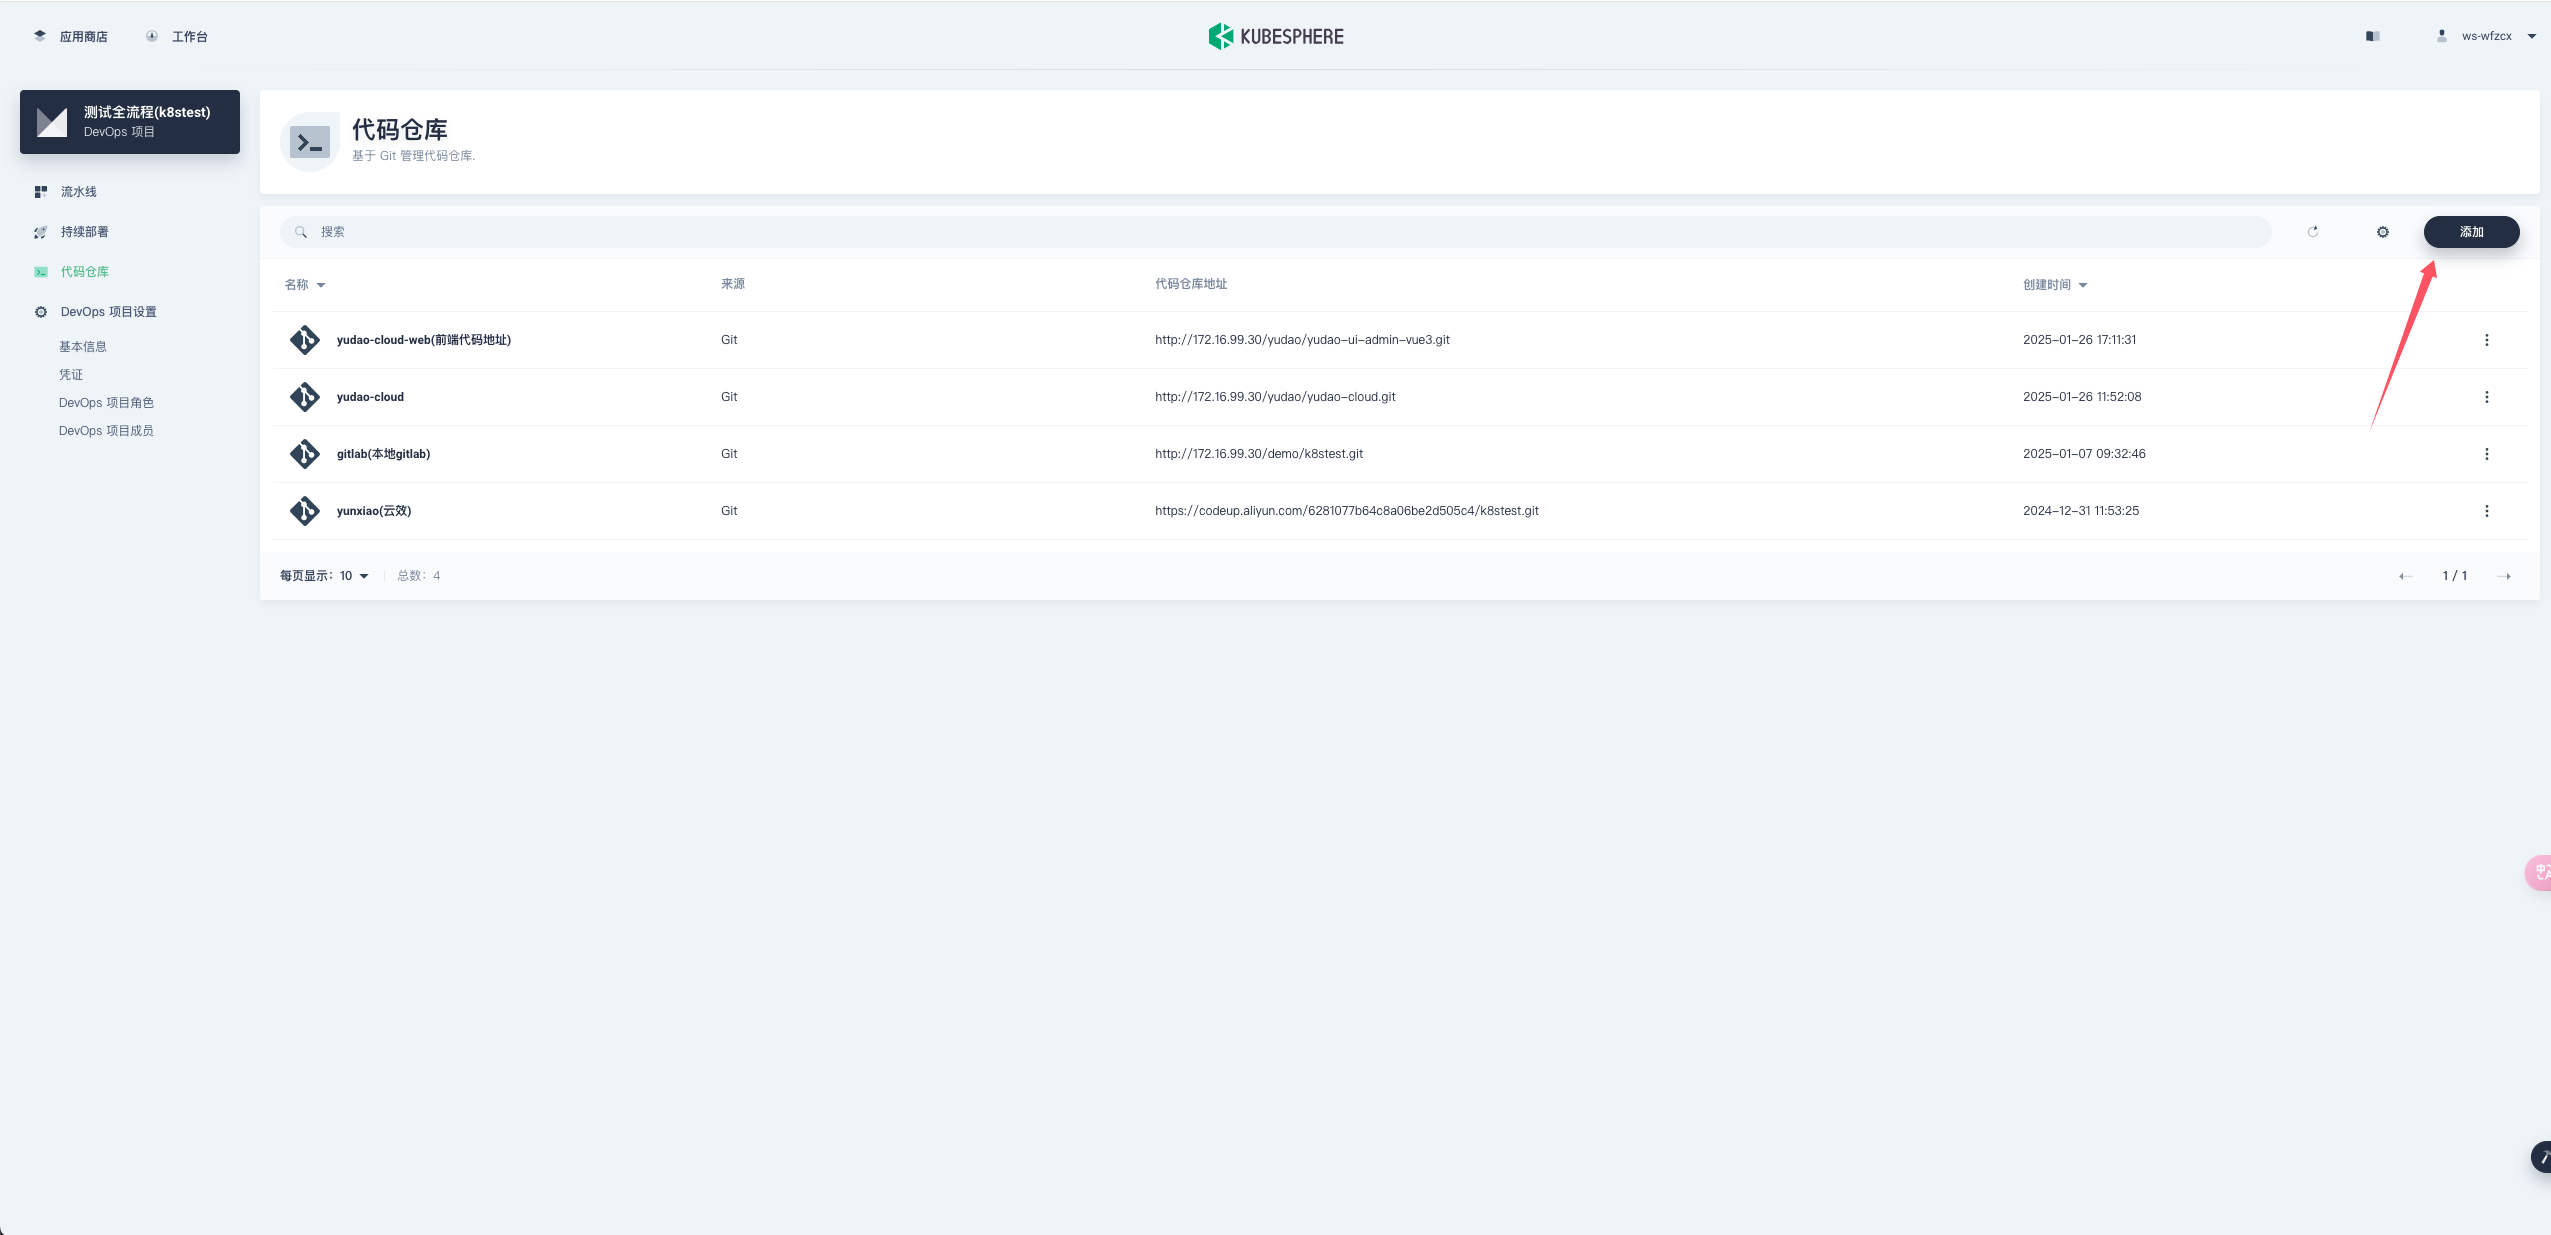
3.3、devops配置代码仓库
3.4、devops配置流水线
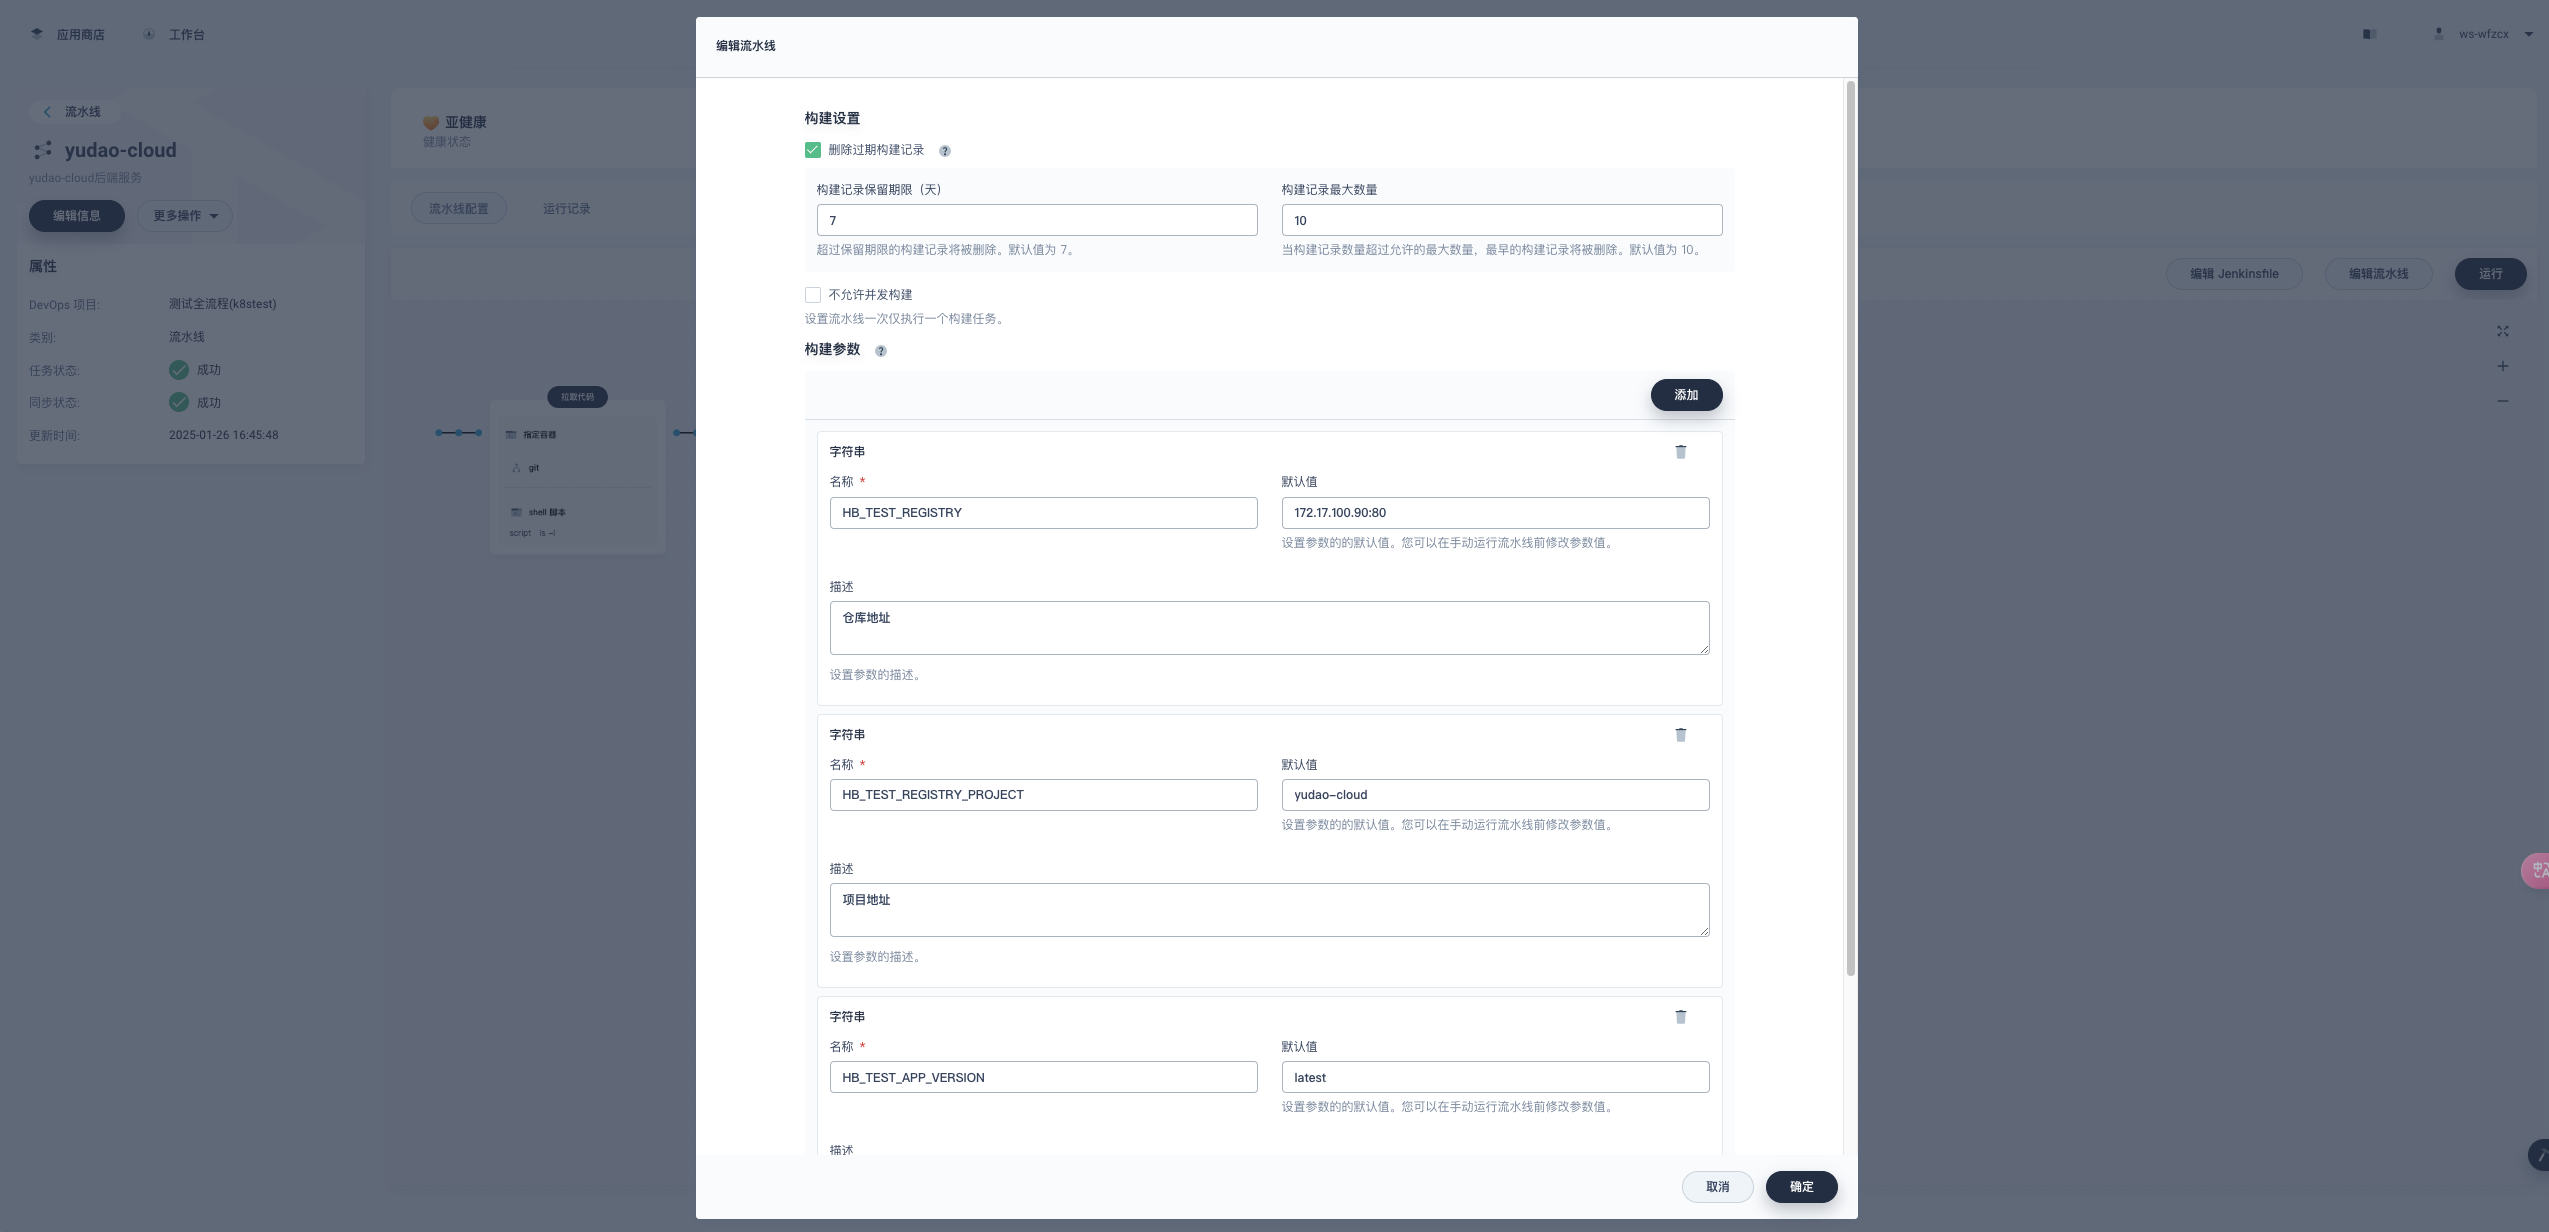
3.4.1、流水线参数
3.4.2流水线jenkins文件
pipeline {
  agent {
    node {
      label 'maven38'
    }

  }
  stages {
    stage('拉取代码') {
      agent none
      steps {
        container('maven') {
          git(url: 'http://172.16.99.30/yudao/yudao-cloud.git', credentialsId: 'gitlab', branch: 'main', changelog: true, poll: false)
          sh 'ls -l'
        }

      }
    }

    stage('集成构建') {
      agent none
      steps {
        container('maven') {
          sh '''mvn -version
java -version
ls -l
mvn clean package -Dmaven.test.skip=true'''
        }

      }
    }

    stage('打包上传镜像') {
      parallel {
        stage('打包gateway') {
          agent none
          steps {
            container('maven') {
              withCredentials([usernamePassword(credentialsId: 'harbor-test', passwordVariable: 'HBTEST_PASS', usernameVariable: 'HBTEST_USER')]) {
                sh 'echo "$HBTEST_PASS" | docker login $HB_TEST_REGISTRY -u "$HBTEST_USER" --password-stdin'
                sh '/bin/cp -rf docker/Dockerfile yudao-gateway'
                sh '''cd yudao-gateway
cat Dockerfile
docker build -t $HB_TEST_REGISTRY/$HB_TEST_REGISTRY_PROJECT/yudao-gateway:$HB_TEST_APP_VERSION -f Dockerfile .
docker push $HB_TEST_REGISTRY/$HB_TEST_REGISTRY_PROJECT/yudao-gateway:$HB_TEST_APP_VERSION'''
              }
            }
          }
        }

        stage('打包system') {
          agent none
          steps {
            container('maven') {
              withCredentials([usernamePassword(credentialsId: 'harbor-test', passwordVariable: 'HBTEST_PASS', usernameVariable: 'HBTEST_USER')]) {
                sh 'echo "$HBTEST_PASS" | docker login $HB_TEST_REGISTRY -u "$HBTEST_USER" --password-stdin'
                sh '/bin/cp -rf docker/Dockerfile yudao-module-system/yudao-module-system-biz'
                sh '''cd yudao-module-system/yudao-module-system-biz
docker build -t $HB_TEST_REGISTRY/$HB_TEST_REGISTRY_PROJECT/yudao-system:$HB_TEST_APP_VERSION -f Dockerfile .
docker push $HB_TEST_REGISTRY/$HB_TEST_REGISTRY_PROJECT/yudao-system:$HB_TEST_APP_VERSION'''
              }

            }

          }
        }

        stage('打包infra') {
          agent none
          steps {
            container('maven') {
              withCredentials([usernamePassword(credentialsId: 'harbor-test', passwordVariable: 'HBTEST_PASS', usernameVariable: 'HBTEST_USER')]) {
                sh 'echo "$HBTEST_PASS" | docker login $HB_TEST_REGISTRY -u "$HBTEST_USER" --password-stdin'
                sh '/bin/cp -rf docker/Dockerfile yudao-module-infra/yudao-module-infra-biz '
                sh '''cd yudao-module-infra/yudao-module-infra-biz
docker build -t $HB_TEST_REGISTRY/$HB_TEST_REGISTRY_PROJECT/yudao-infra:$HB_TEST_APP_VERSION -f Dockerfile .
docker push $HB_TEST_REGISTRY/$HB_TEST_REGISTRY_PROJECT/yudao-infra:$HB_TEST_APP_VERSION'''
              }

            }

          }
        }

      }
    }

  }
  parameters {
    string(name: 'HB_TEST_REGISTRY', defaultValue: '172.17.100.90:80', description: '仓库地址')
    string(name: 'HB_TEST_REGISTRY_PROJECT', defaultValue: 'yudao-cloud', description: '项目地址')
    string(name: 'HB_TEST_APP_VERSION', defaultValue: 'latest', description: '版本号')
  }
}
其中的maven38为自己构建的agent
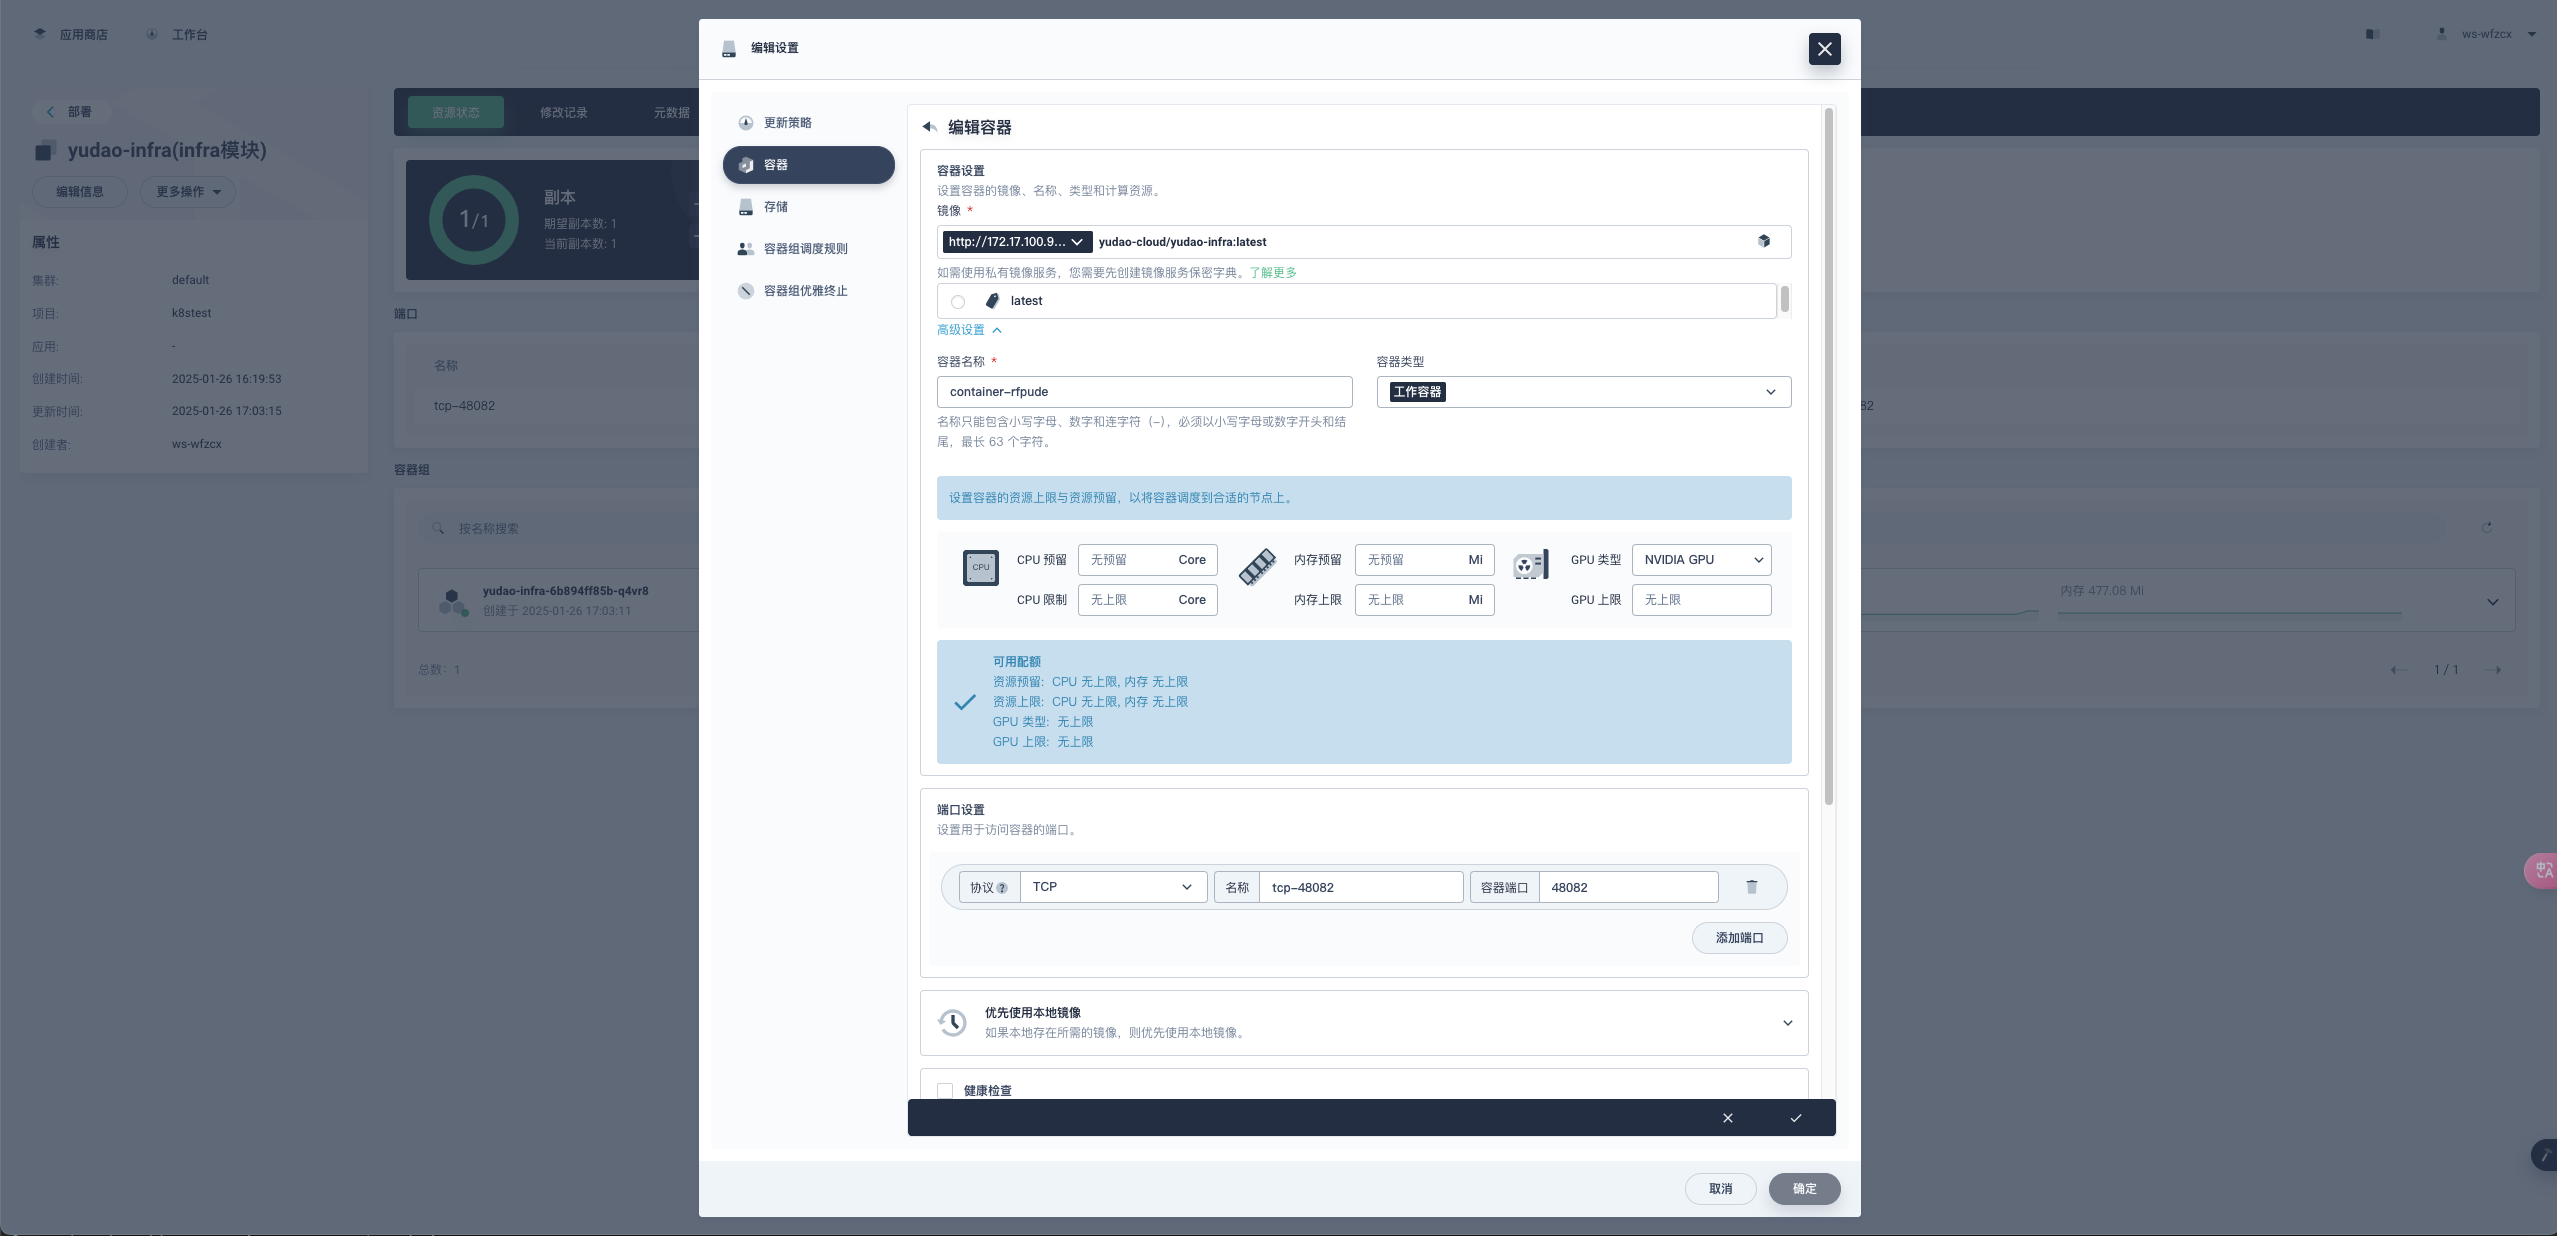
四、创建服务
备注:后续全部集成jenkins后,可以不执行此步骤
也可以先创建负载,后创建服务,这里直接负载与服务一起创建,好处是创建后服务的名字可以指定。
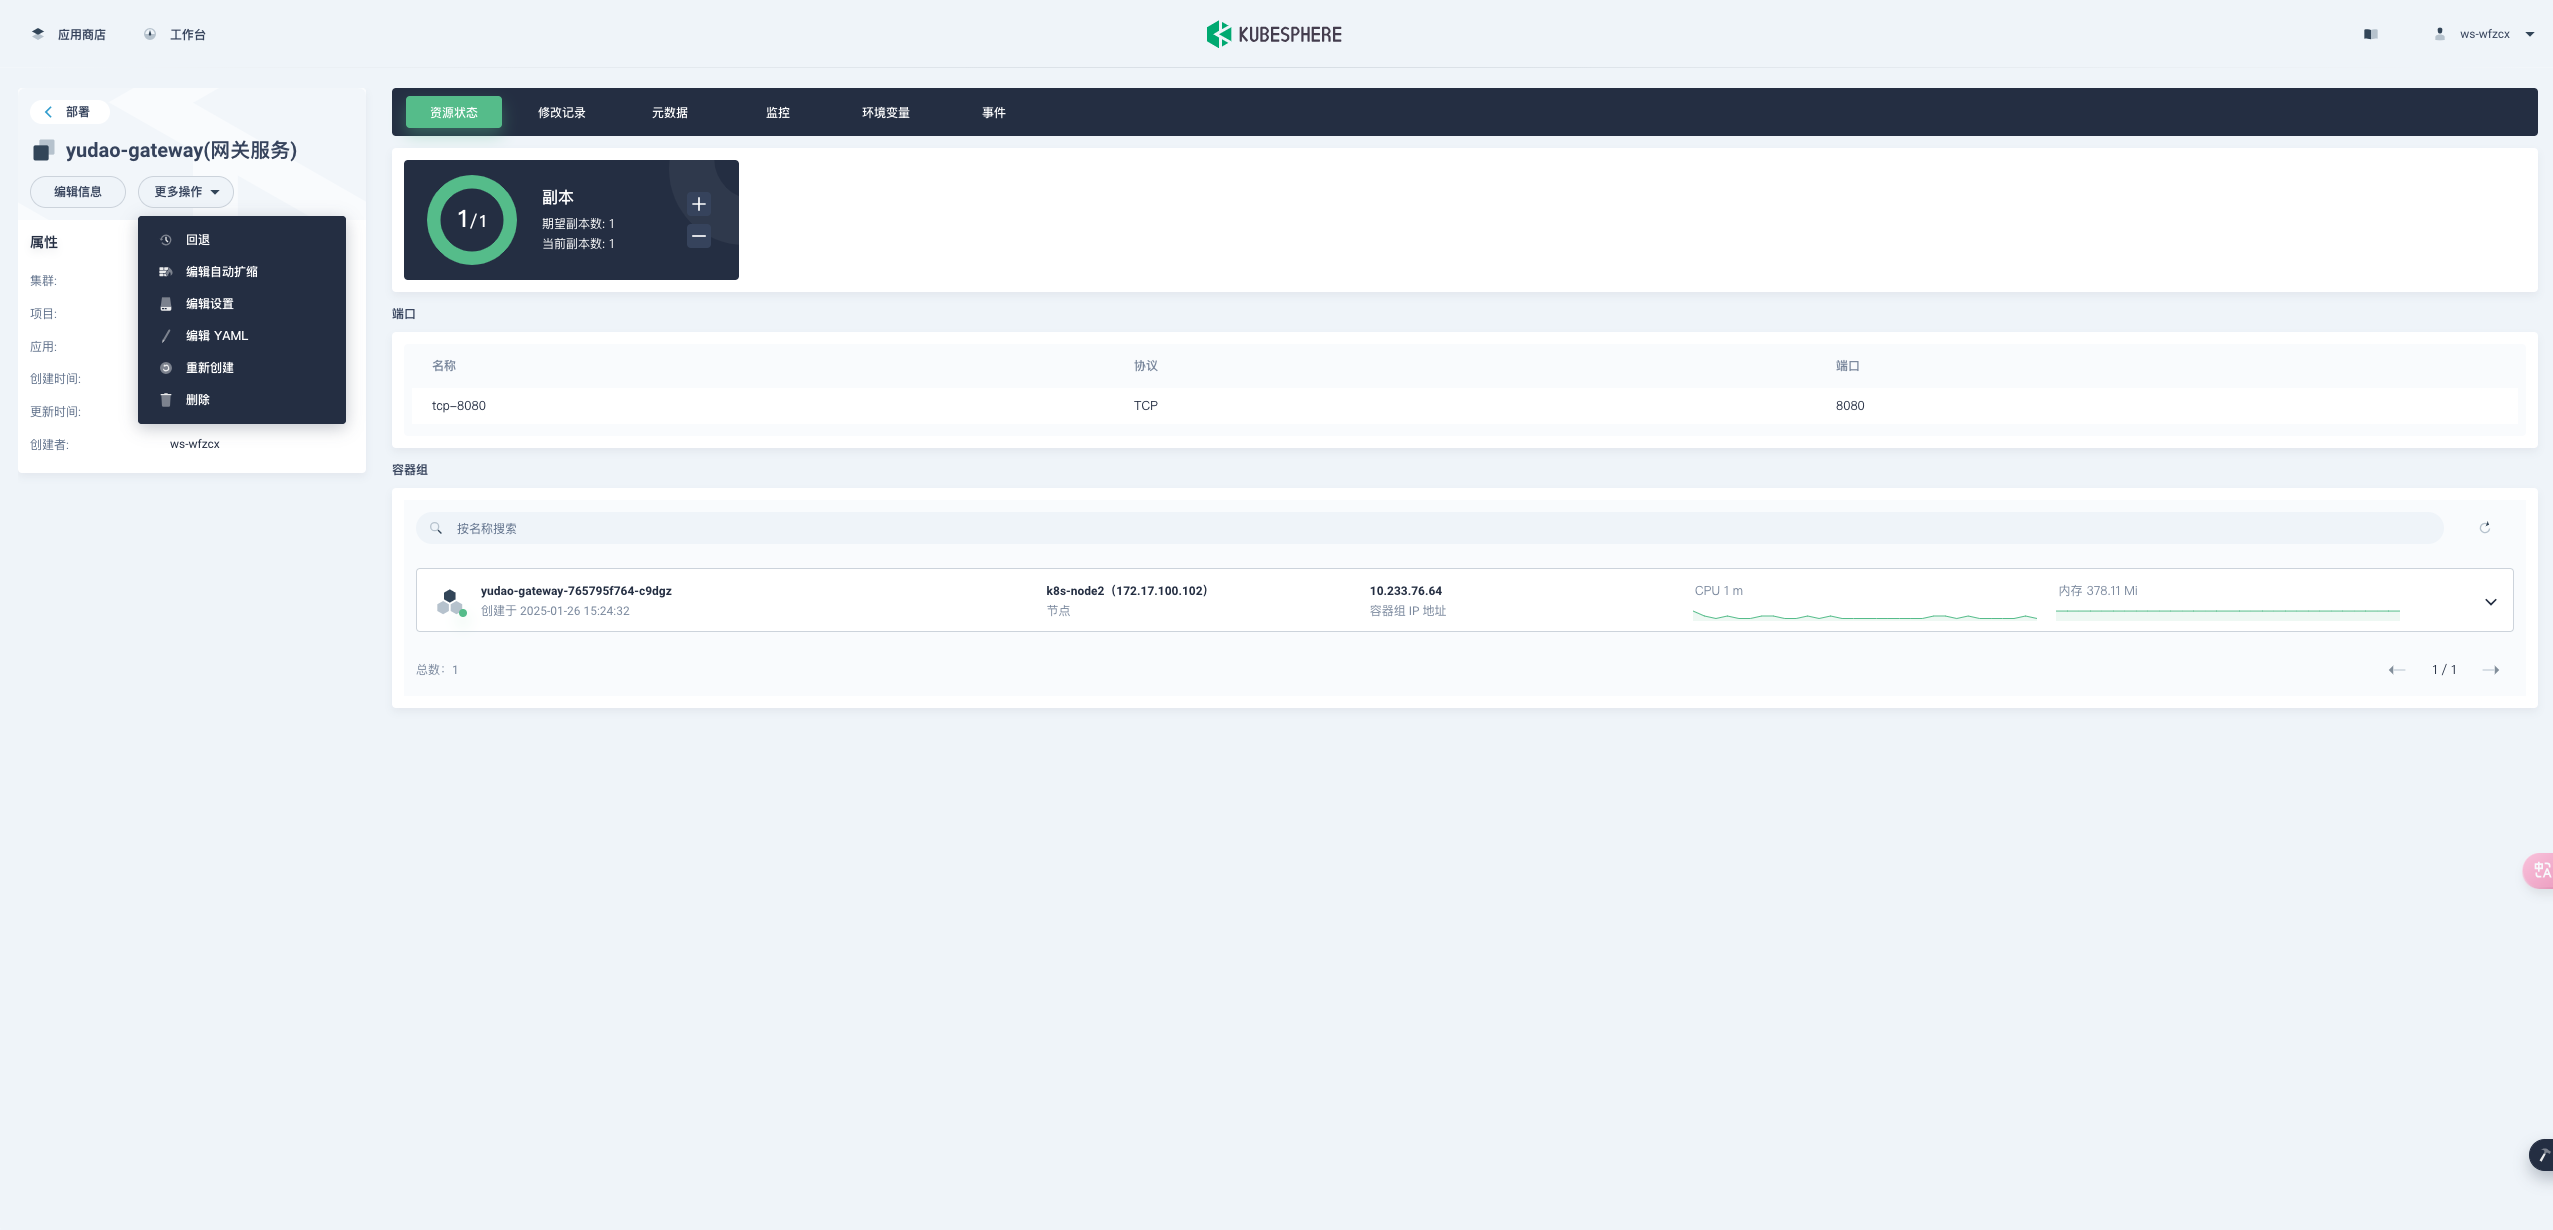
创建三个无状态服务分别为gateway、system、infra,只需要进行容器设置即可,无需挂载存储卷。
五、修改nacos的配置文件
创建存储空间test
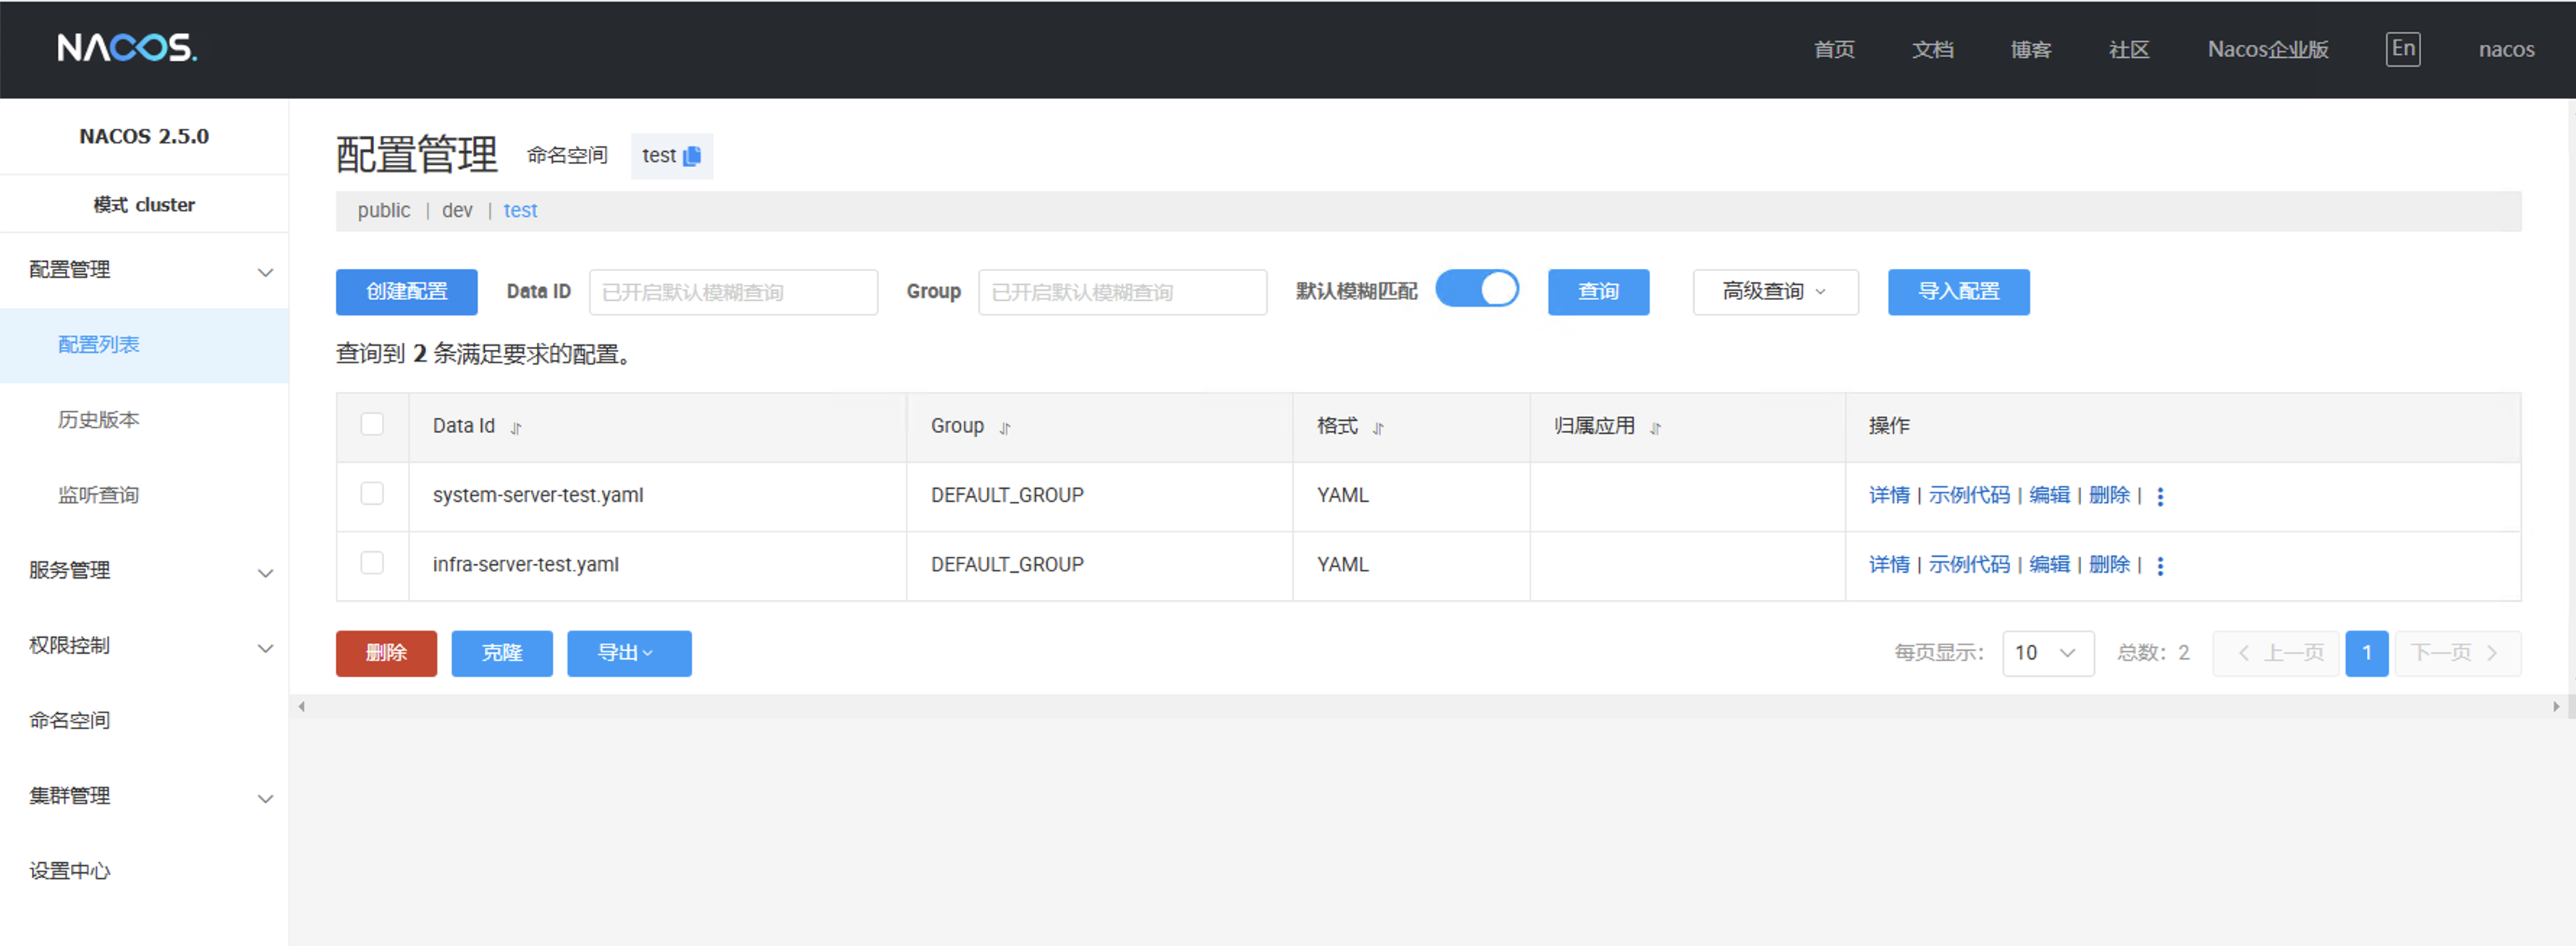
主要修改mysql的数据库连接信息,摘取的部分配置如下
      datasource:
        master:
          url: jdbc:mysql://mysql-svc.k8stest:3306/ruoyi-vue-pro?useSSL=false&serverTimezone=Asia/Shanghai&allowPublicKeyRetrieval=true&nullCatalogMeansCurrent=true&rewriteBatchedStatements=true # MySQL Connector/J 8.X 连接的示例
          username: root
          password: wfzcx123!
        slave: # 模拟从库,可根据自己需要修改
          lazy: true # 开启懒加载,保证启动速度
          url: jdbc:mysql://mysql-svc.k8stest:3306/ruoyi-vue-pro?useSSL=false&serverTimezone=Asia/Shanghai&allowPublicKeyRetrieval=true&nullCatalogMeansCurrent=true&rewriteBatchedStatements=true
          username: root
          password: wfzcx123!
六、增加自动部署部分
流水线中增加步骤
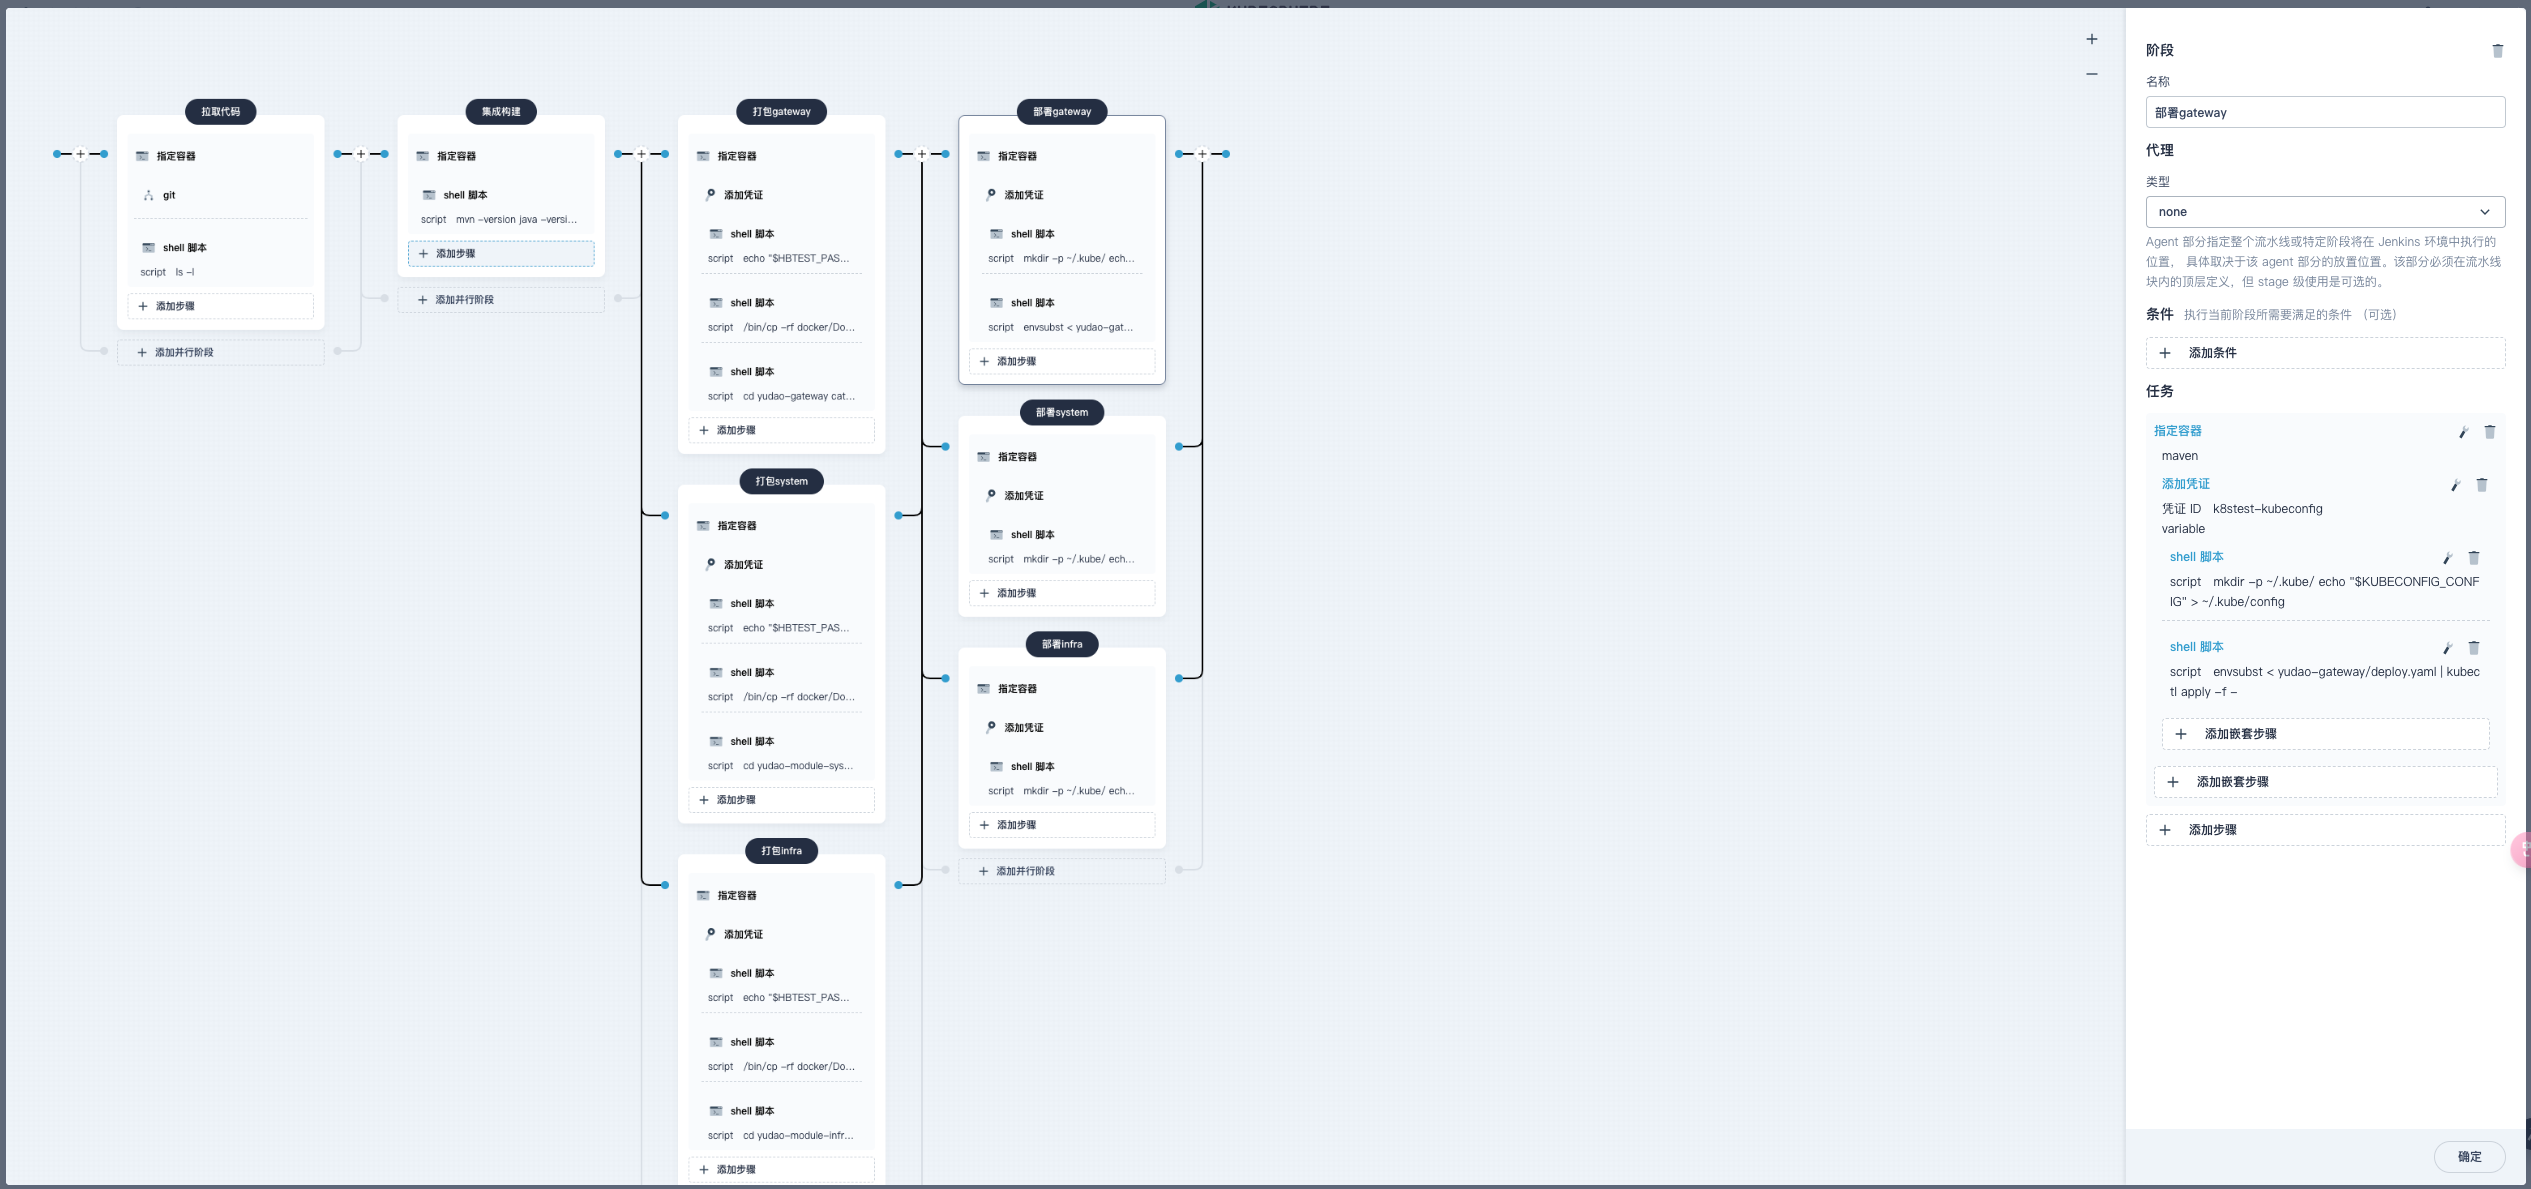
6.1、gateway配置
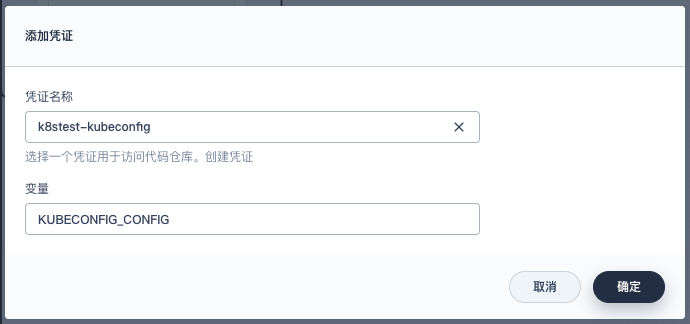
其中的凭证配置,需要到devops中配置kubeconfig即可,直接输入名字保存即可以直接使用
参数名KUBECONFIG_CONFIG
shell命令,能够执行kubectl命令,需要容器中安装了kubectl才可以
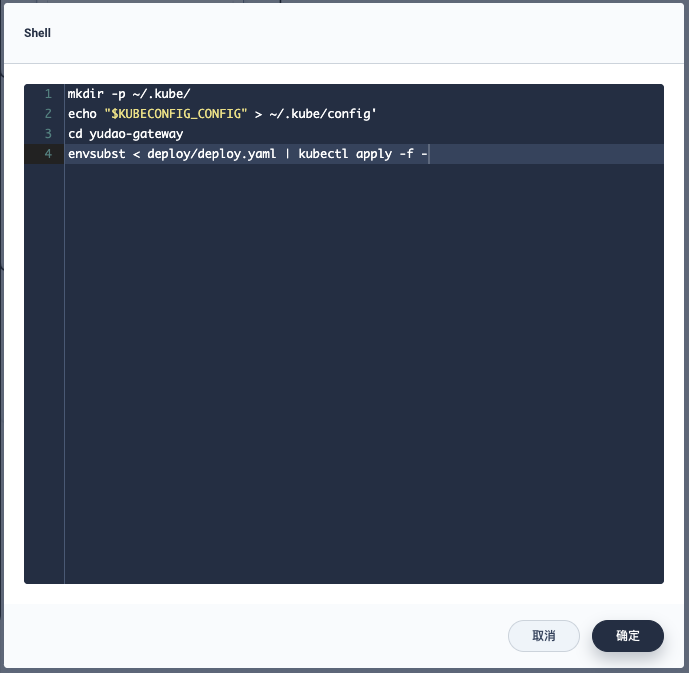
mkdir -p ~/.kube/
echo "$KUBECONFIG_CONFIG" > ~/.kube/config
cd yudao-gateway
envsubst < deploy.yaml | kubectl apply -f -
6.2、system模块配置
凭证部分类似,命令部分只是进入的路径不同
mkdir -p ~/.kube/
echo "$KUBECONFIG_CONFIG" > ~/.kube/config
cd yudao-module-system/yudao-module-system-biz
envsubst < deploy.yaml | kubectl apply -f -
6.3、infra模块配置
凭证部分类似,命令部分只是进入的路径不同
mkdir -p ~/.kube/
echo "$KUBECONFIG_CONFIG" > ~/.kube/config
cd yudao-module-infra/yudao-module-infra-biz
envsubst < deploy.yaml | kubectl apply -f -
6.4编写deploy.yaml
可以直接到第四步中在创建的负载中,把deployment部分的yaml文件粘贴过来
6.4.1、gateway
修改其中的下载镜像部分即可
kind: Deployment
apiVersion: apps/v1
metadata:
  name: yudao-gateway
  namespace: k8stest
  labels:
    app: yudao-gateway
  annotations:
    deployment.kubernetes.io/revision: '1'
    kubesphere.io/alias-name: 网关服务
    kubesphere.io/creator: ws-wfzcx
spec:
  replicas: 1
  selector:
    matchLabels:
      app: yudao-gateway
  template:
    metadata:
      creationTimestamp: null
      labels:
        app: yudao-gateway
      annotations:
        kubesphere.io/creator: ws-wfzcx
        kubesphere.io/imagepullsecrets: '{"container-d18oqj":"harbor"}'
    spec:
      volumes:
        - name: host-time
          hostPath:
            path: /etc/localtime
            type: ''
      containers:
        - name: container-d18oqj
          image: '$HB_TEST_REGISTRY/$HB_TEST_REGISTRY_PROJECT/yudao-gateway:$HB_TEST_APP_VERSION'
          ports:
            - name: tcp-8080
              containerPort: 8080
              protocol: TCP
          resources: {}
          volumeMounts:
            - name: host-time
              readOnly: true
              mountPath: /etc/localtime
          terminationMessagePath: /dev/termination-log
          terminationMessagePolicy: File
          imagePullPolicy: IfNotPresent
      restartPolicy: Always
      terminationGracePeriodSeconds: 30
      dnsPolicy: ClusterFirst
      serviceAccountName: default
      serviceAccount: default
      securityContext: {}
      imagePullSecrets:
        - name: harbor
      schedulerName: default-scheduler
  strategy:
    type: RollingUpdate
    rollingUpdate:
      maxUnavailable: 25%
      maxSurge: 25%
  revisionHistoryLimit: 10
  progressDeadlineSeconds: 600
6.4.2、system
$HB_TEST_REGISTRY/$HB_TEST_REGISTRY_PROJECT/yudao-system:$HB_TEST_APP_VERSION
kind: Deployment
apiVersion: apps/v1
metadata:
  name: yudao-system
  namespace: k8stest
  labels:
    app: yudao-system
  annotations:
    deployment.kubernetes.io/revision: '1'
    kubesphere.io/alias-name: system模块
    kubesphere.io/creator: ws-wfzcx
spec:
  replicas: 1
  selector:
    matchLabels:
      app: yudao-system
  template:
    metadata:
      creationTimestamp: null
      labels:
        app: yudao-system
      annotations:
        kubesphere.io/creator: ws-wfzcx
        kubesphere.io/imagepullsecrets: '{"container-7qxf06":"harbor"}'
    spec:
      volumes:
        - name: host-time
          hostPath:
            path: /etc/localtime
            type: ''
      containers:
        - name: container-7qxf06
          image: '$HB_TEST_REGISTRY/$HB_TEST_REGISTRY_PROJECT/yudao-system:$HB_TEST_APP_VERSION'
          ports:
            - name: tcp-8080
              containerPort: 8080
              protocol: TCP
          resources: {}
          volumeMounts:
            - name: host-time
              readOnly: true
              mountPath: /etc/localtime
          terminationMessagePath: /dev/termination-log
          terminationMessagePolicy: File
          imagePullPolicy: IfNotPresent
      restartPolicy: Always
      terminationGracePeriodSeconds: 30
      dnsPolicy: ClusterFirst
      serviceAccountName: default
      serviceAccount: default
      securityContext: {}
      imagePullSecrets:
        - name: harbor
      schedulerName: default-scheduler
  strategy:
    type: RollingUpdate
    rollingUpdate:
      maxUnavailable: 25%
      maxSurge: 25%
  revisionHistoryLimit: 10
  progressDeadlineSeconds: 600
6.4.3、infra
$HB_TEST_REGISTRY/$HB_TEST_REGISTRY_PROJECT/yudao-infra:$HB_TEST_APP_VERSION
kind: Deployment
apiVersion: apps/v1
metadata:
  name: yudao-infra
  namespace: k8stest
  labels:
    app: yudao-infra
  annotations:
    deployment.kubernetes.io/revision: '1'
    kubesphere.io/alias-name: infra模块
    kubesphere.io/creator: ws-wfzcx
spec:
  replicas: 1
  selector:
    matchLabels:
      app: yudao-infra
  template:
    metadata:
      creationTimestamp: null
      labels:
        app: yudao-infra
      annotations:
        kubesphere.io/creator: ws-wfzcx
        kubesphere.io/imagepullsecrets: '{"container-rfpude":"harbor"}'
    spec:
      volumes:
        - name: host-time
          hostPath:
            path: /etc/localtime
            type: ''
      containers:
        - name: container-rfpude
          image: '$HB_TEST_REGISTRY/$HB_TEST_REGISTRY_PROJECT/yudao-infra:$HB_TEST_APP_VERSION'
          ports:
            - name: tcp-48082
              containerPort: 48082
              protocol: TCP
          resources: {}
          volumeMounts:
            - name: host-time
              readOnly: true
              mountPath: /etc/localtime
          terminationMessagePath: /dev/termination-log
          terminationMessagePolicy: File
          imagePullPolicy: IfNotPresent
      restartPolicy: Always
      terminationGracePeriodSeconds: 30
      dnsPolicy: ClusterFirst
      serviceAccountName: default
      serviceAccount: default
      securityContext: {}
      imagePullSecrets:
        - name: harbor
      schedulerName: default-scheduler
  strategy:
    type: RollingUpdate
    rollingUpdate:
      maxUnavailable: 25%
      maxSurge: 25%
  revisionHistoryLimit: 10
  progressDeadlineSeconds: 600
评论区